Latest news about Bitcoin and all cryptocurrencies. Your daily crypto news habit.
Add in-depth, production ready analytics to your application in minutes using AWS Amplify & AWS Mobile Hub.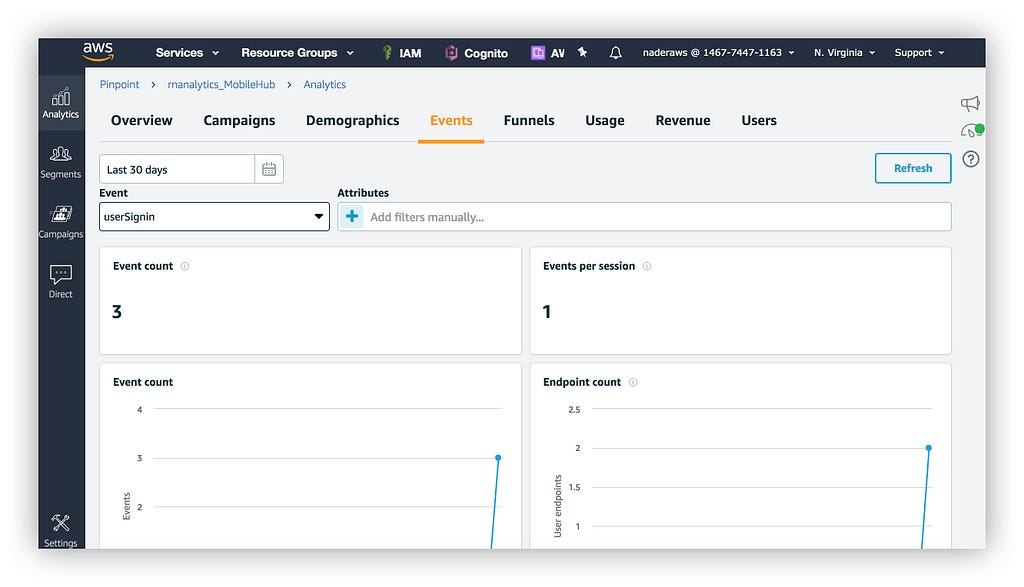
Usually, tracking and analytics is a part of the app that is not considered in “build-time”, despite its critical importance for the success of the product.
Tracking is critically important to understand how your users are interacting with your app, answering questions like:
- Which app features are being used?
- What is the time spent within the app, and using certain features?
- How frequently is my app visited?
- How users are interacting with UI elements (swipes, gestures, etc..)
Amplify helps developers with ‘out-of-the-box’ analytics support for these types of analytics and more.
In this tutorial, we will be adding analytics to a React Native Application using Amplify.
AWS Amplify currently works with React, React Native, Angular, & Ionic, with Vue coming soon!
Getting Started
The first thing we will do is create a new React Native project. You can use either Expo (create-react-native-app) or the React Native CLI.
react-native init RNAnalytics
Next, we will need to install the AWS Mobile CLI. This will allow us to create and interact with mobile projects directly from our command line.
npm i -g awsmobile-cli
Now, we need to configure the cli with our credentials.
If you already have the AWS SDK installed and configured, the awsmobile-CLI will automatically inherit these settings.
awsmobile configure
Here, you will need to enter your AWS region, IAM accessKeyId, and IAM secretAccessKey.
To see a walkthrough of how to get these credentials and configure the CLI, watch this video:
Creating a new AWS Mobile Project
Now that we have the CLI installed and the React Native project created, we can add analytics using the AWS Mobile CLI.
You can also go into Mobile Hub, create your own project, and configure your aws-exports file manually, but we will be using the command line to automate this process. Both processes will produce the same result.
Change into the root directory of the project, create a folder called src, and run awsmobile init:
cd RNAnalyticsmkdir srcawsmobile init
Once you run awsmobile init, you will be prompted with a few options regarding the configuration of your project. You can choose the default for all of these if you would like by just pressing enter, or feel free to give your project a custom name prompted.
This has automatically created and configured a new AWS Mobile Hub project for you and provisioned S3 as well as Pinpoint Analytics! You should also now see an aws-exports.js file in the src folder of your root directory.You can view your new application at https://console.aws.amazon.com/mobilehub/home if you would like.
Tracking Events and Sessions
Now, we are ready to start tracking!
Open App.js and add the following code below the last React Native import:
import Amplify, { Analytics } from 'aws-amplify'import aws_exports from './aws-exports'Amplify.configure(aws_exports)Now, let’s go ahead and refresh our app.
That is it, we now have Analytics installed and tracking! Out of the box, this configuration will begin tracking things like sessions, device type, and will give you information on active users.
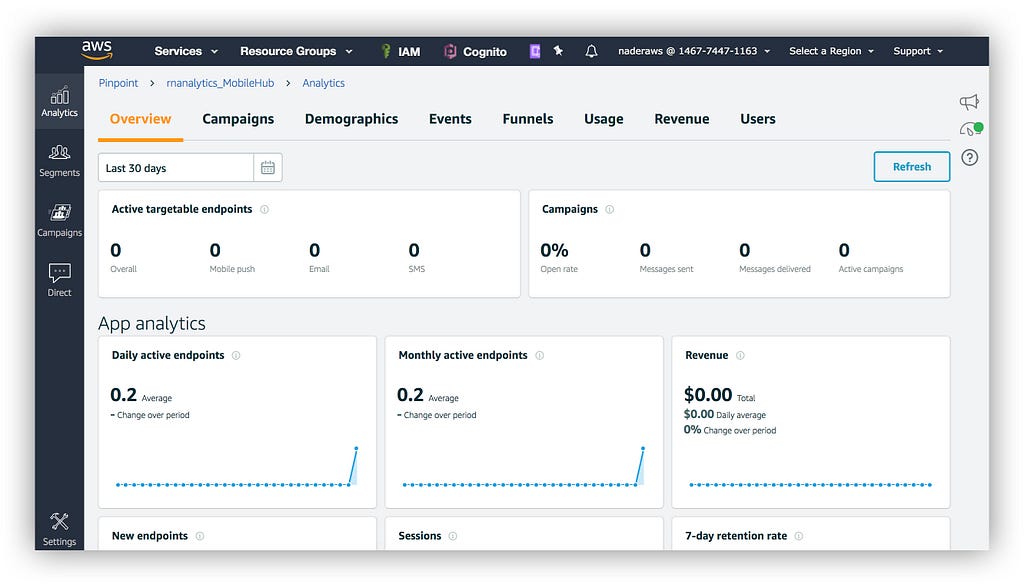
You should now be able to go to https://console.aws.amazon.com/pinpoint/home/, click on the app you just created, click on Analytics on the left side menu, and see the new session show up along with some information about the device.
Now, let’s start tracking a few custom events!
We can use the Analytics.record() method to track custom events. One event that may make sense is to track when a user opens the app, as in when it goes into the background and then into the foreground.
Let’s use AppState from the React Native API to listen for the current application state. If it is active, we will record an “App Opened” event!
In App.js, let’s also import the AppState component from React Native, and set up a couple of new methods in the class:
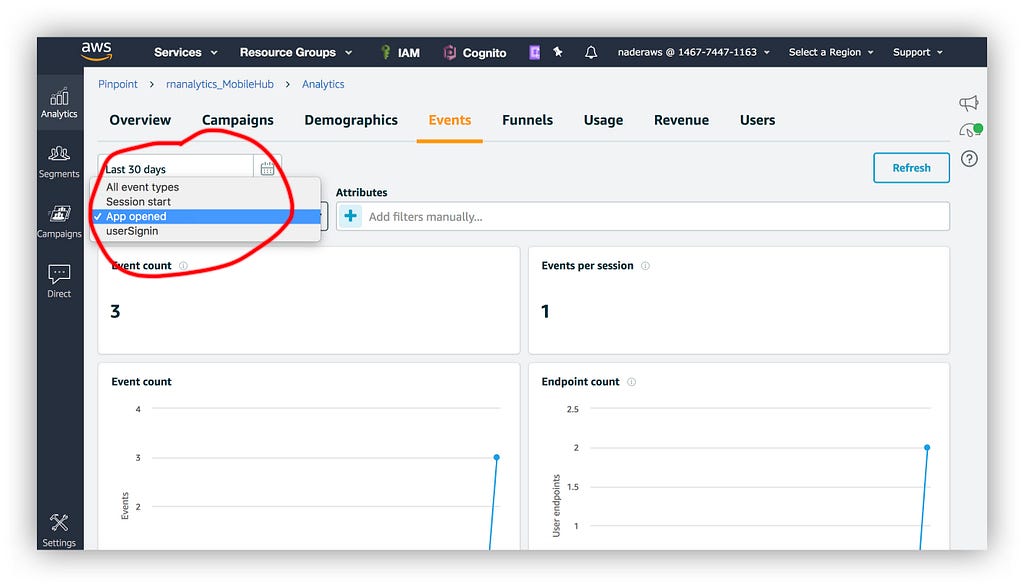
import { Platform, StyleSheet, Text, AppState, View} from 'react-native'import Amplify, { Analytics } from 'aws-amplify'import aws_exports from './src/aws-exports'Amplify.configure(aws_exports)export default App extends React.Component { componentDidMount() { AppState.addEventListener('change', this.onAppStateChange) } onAppStateChange(appState) { if (appState === 'active') { Analytics.record('App opened') } } render() { // rest of class }}Now, let’s refresh our application, place the app in the background and then back into the foreground a few times, and then open up the Pinpoint console, click on Analytics and then the Events tab.
You should now be able to choose the new event from the Event dropdown menu in the console, and see the data from the new event!
Tracking Attributes and Metrics
We also have the ability to track attributes and metrics. Attributes are often things like information about the current user or a dynamic value such as the type of item a user is viewing in a shopping application, while metrics are often things like computed time within a certain page or the number of times a user has viewed a certain item within that same shopping application.
To track attributes, we pass a second argument to record:
Analytics.record(name: string, attributes?: object, metrics?: object)
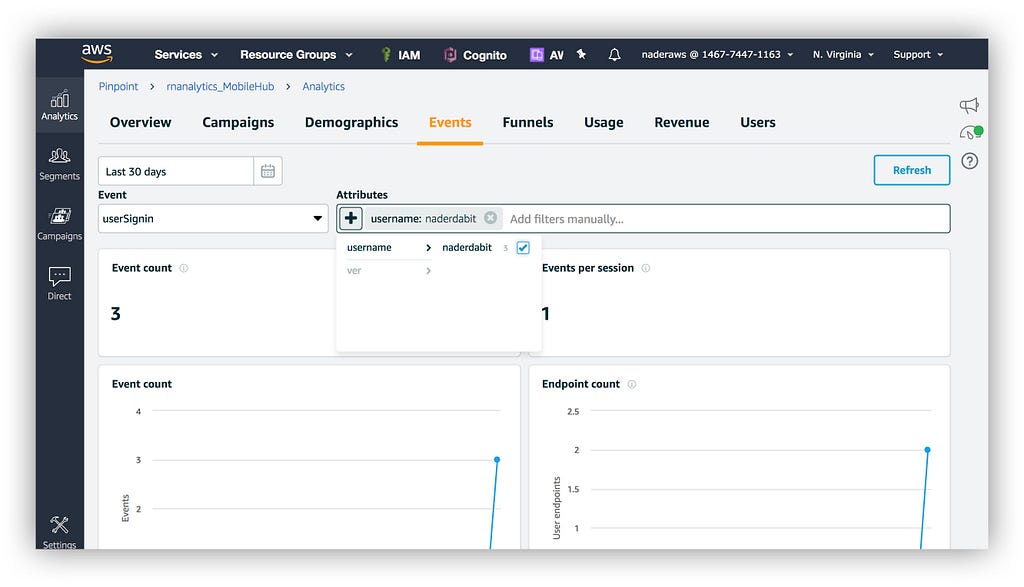
So, let’s try to manually simulate the tracking of a user sign in. To do so, we will create a username, store it in the state, and send this event to Pinpoint:
state = { username: 'naderdabit'}trackUser() { Analytics.record('userSignin', { username: this.state.username })}render() {// <Button title='Sign In' onPress={this.trackUser}>//}You should now be able to go back into your Analytics dashboard, choose userSignin from the Event dropdown menu, and then view the available attributes on the right, choosing the user you would like to view and seeing the information about the user.
The method of tracking metrics is exactly the same, just passing in the object as the third argument.
If you would like to only track name and metrics, you can pass an empty object as the second argument:
Analytics.record('timeSpentOnPage', {}, { pageName: shoes, time: 23000 })To view the documentation for Analytics, click here.
Roadmap
- Crash analytics
- Exception logging
- Actions based on users’ app activity (Send a one-time notification to user not visiting for 30 days …., Pinpoint campaigns (push, sms, email)
What we have covered in this short tutorial is only a small part of what you can do with the Amplify library. With the existing project that we have already created, it’s also pretty simple to also add things like Authentication! To learn more about how to add Authentication, check out this blog post. To learn more about what Amplify can do, check out the docs.
My Name is Nader Dabit . I am a Developer Advocate at AWS Mobile working with projects like AppSync and Amplify, and the founder of React Native Training.If you like React and React Native, checkout out our podcast — React Native Radioon Devchat.tv.Also, check out my book, React Native in Action now available from Manning PublicationsIf you enjoyed this article, please recommend and share it! Thanks for your time
Adding Analytics to Your Next Mobile JavaScript Application was originally published in Hacker Noon on Medium, where people are continuing the conversation by highlighting and responding to this story.
Publication date
Disclaimer
The views and opinions expressed in this article are solely those of the authors and do not reflect the views of Bitcoin Insider. Every investment and trading move involves risk - this is especially true for cryptocurrencies given their volatility. We strongly advise our readers to conduct their own research when making a decision.