Latest news about Bitcoin and all cryptocurrencies. Your daily crypto news habit.

Most ICOs release their tokens on Ethereum. There are a a few reasons for this: The ecosystem is pretty good, Ethereum is turing-complete, and of course everyone else is doing it.
But there are some real downsides too. Ethereum maxes out around 14 transactions a second. That’s 14 for everyone — you, and the other 1000 ICOs get to split that. This is already becoming a real issue and is already causing some existing dApps to move off the Ethereum Platform.
There are other options. At Blocksimple, our products are built to be as platform agnostic as possible. So today I’m going to introduce another network we support: Stellar Lumens (XLM), and I’m going to show you how to create your own custom token that can form the basis of an ecosystem.
In this article I’ll show you how to issue a token I’m going to call “BLOCKSIMPLE”.
Here are the steps involved:
- Create 2 accounts (One for Issuance, another for Distribution).
- Execute a change of trust transaction from Distribution to Issuance.
- Create the token.
- Lock Supply
- Distribute!
Creating the Stellar accounts.
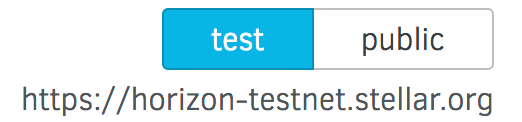
Go here. This is a web tool that allows you to create and fund stellar accounts. It will also allow you to fund that account on the testnet. You will need 72 lumens.
Make sure that you have “test” selected in the upper right. This is critical
You will need TWO (2) accounts. One to act as the issuer and one to act as the distributor account. If you do this on the live net, you’ll need to have at least 72 Lumens to execute everything.
An account is just a public/private keypair, like so:
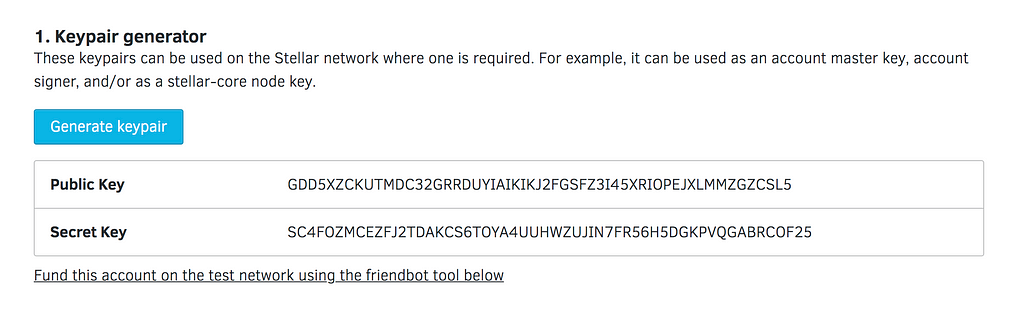 Account created for this demo. This is the issuer.
Create two and save them to your local computer. Make sure you clearly label somehow one as issuer and one as distributor. For me, I saved the data as “issuer-test-account-Stellar.txt” and “distributor-test-account-Stellar.txt”.
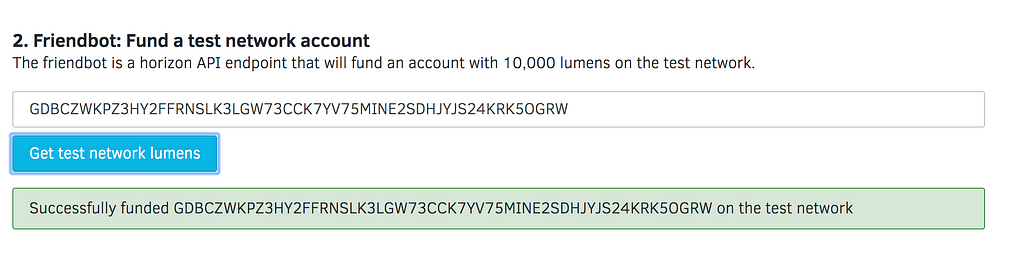
Then fund them, like so (this is the distributor account):
Why two accounts? In Stellar, there is nothing really stopping a token issuing account from creating infinite tokens and flooding the market. Therefore, account #1 (Issuer) creates and issues the token to account #2 (distributor). Then account #1 is permanently locked so that it can no longer issue tokens. This guarantees to the world that no more tokens will be released to flood the market.
Using the testnet faucet and fund both accounts with lumens. Make sure that the slider in the top right is set to “test”.
2. Change the trust between the two accounts.
Unlike Ethereum, Stellar does not have turing complete smart contracts. While the Ethereum approach gives maximum flexibility it is also much higher risk and failure prone, as evidenced by the history of major hacks like the DAO and the relatively recent parity wallet failure.
In Stellar, smart contracts are a sequence of transactions, of which Stellar has many built in types. One of those transaction types is “Change Trust”.
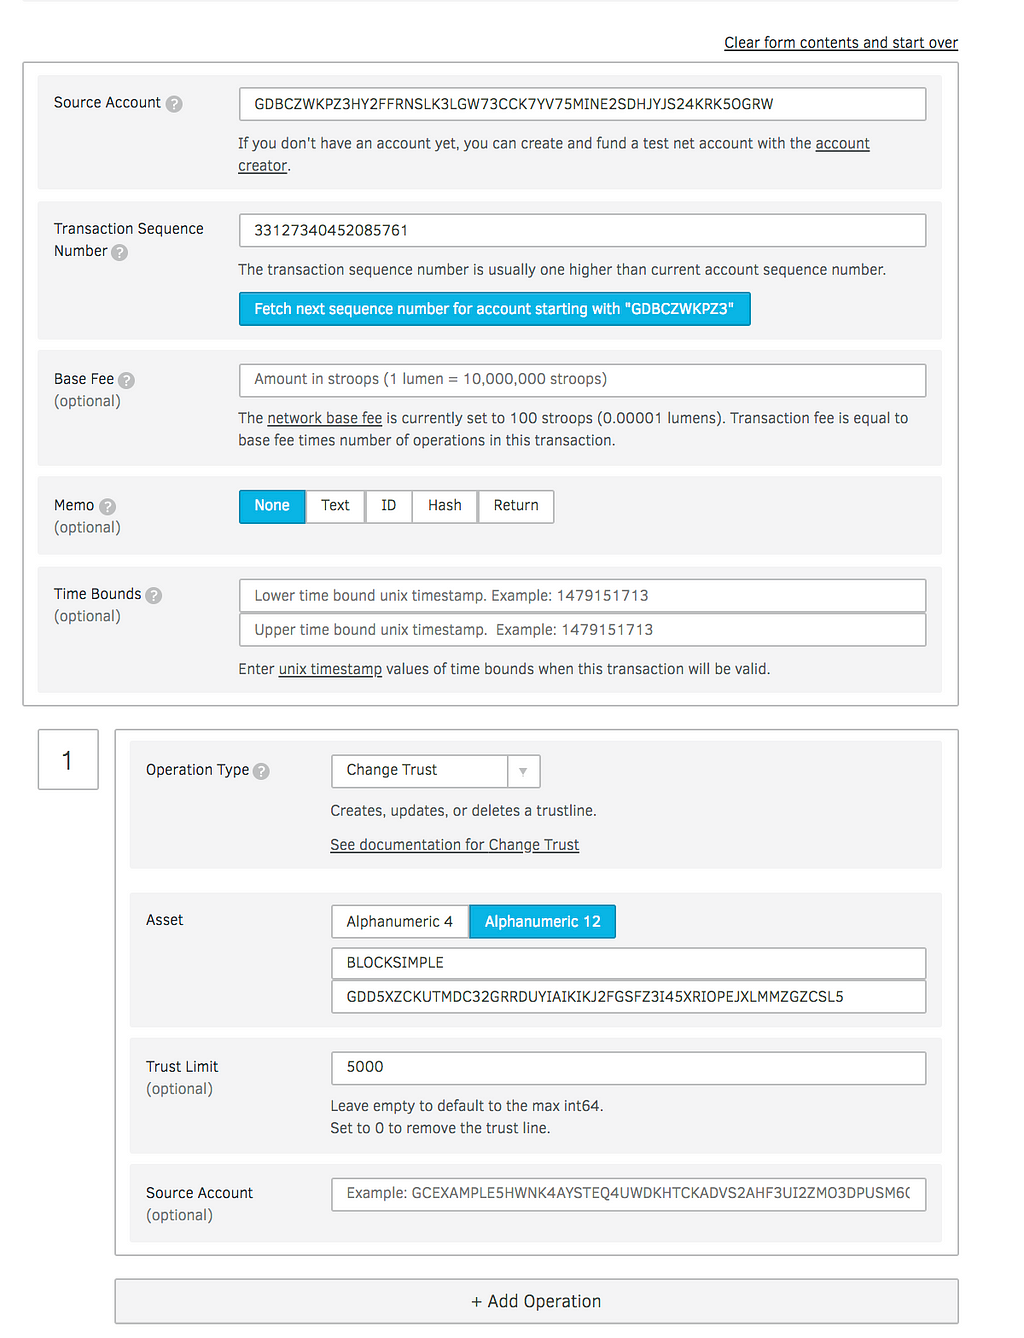
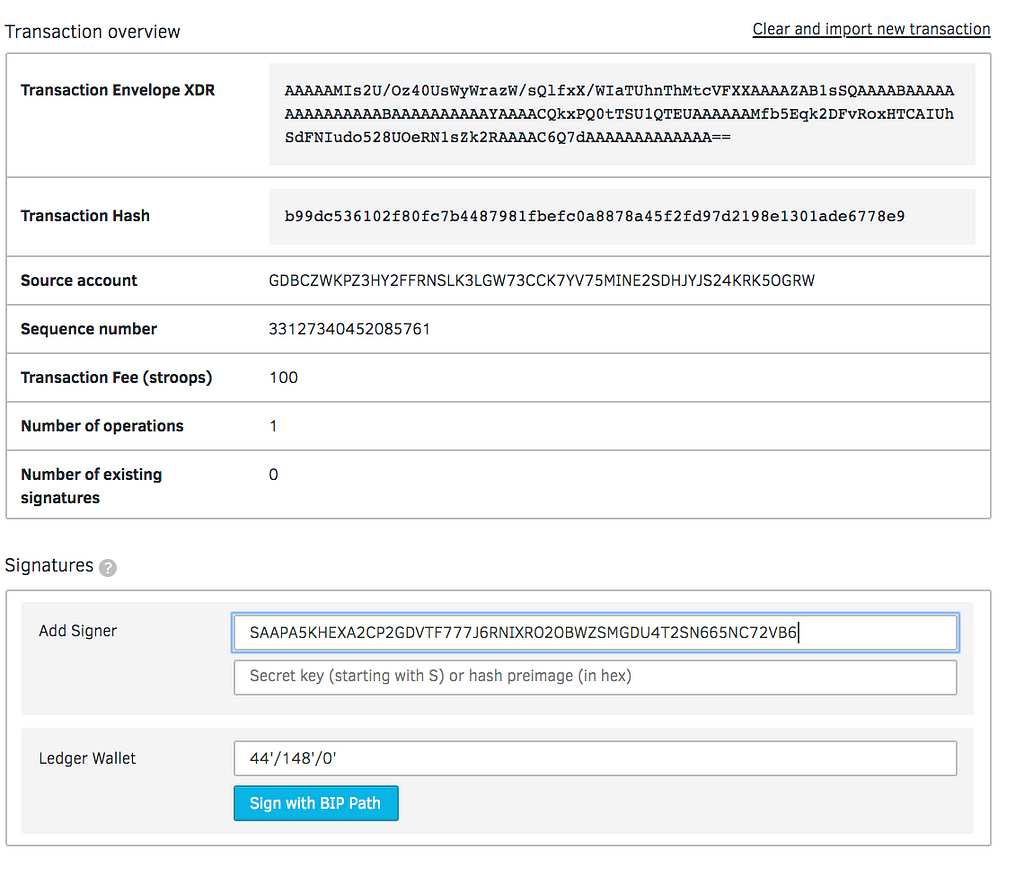
For us to issue the token, we need to issue a change trust transaction between the distribution account and the issuance account. You can do that through this handy web interface.
Using the accounts you have created, change trust using the distribution account aimed at the issuing account:
Submit this using your private key
And you’ll come to this final screen:
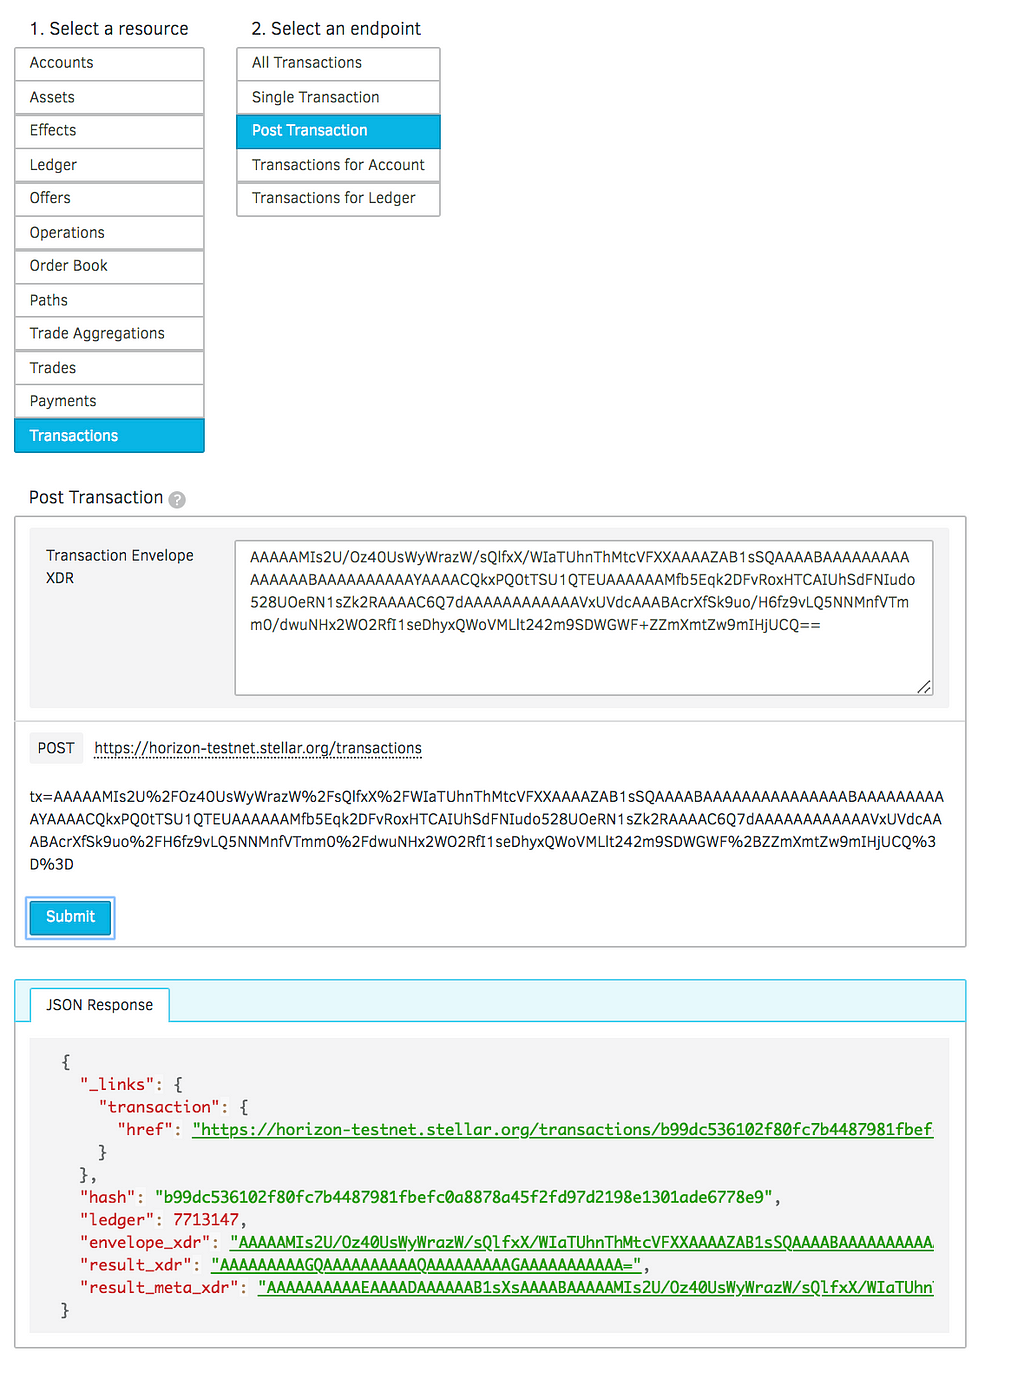
If all goes well, you’ll see a JSON response similar to above.
Creating the Actual Token
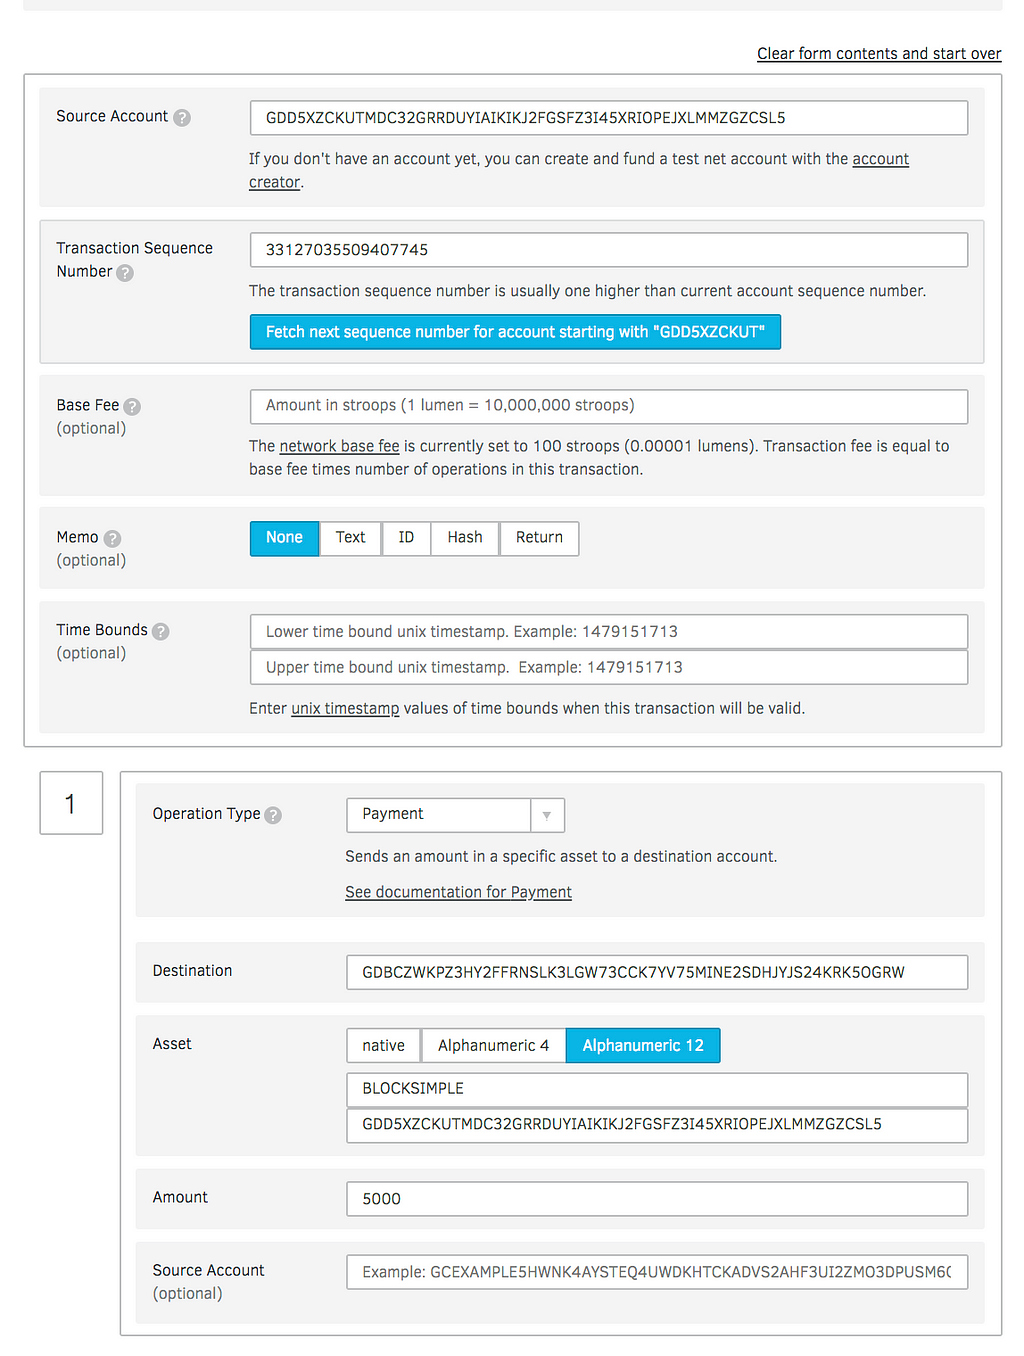
This step is not intuitive: the token creation is done by sending a payment from the issuing account to the distribution account, denominated in the new token. This is why we had to change trust to begin with — the distribution account issued a statement of trust that this “BLOCKSIMPLE” thing was the real deal.
Using the transaction builder, this is what that operation looks like:
 YOU GOT BLOCKSIMPLE IN YOUR (TEST) WALLET
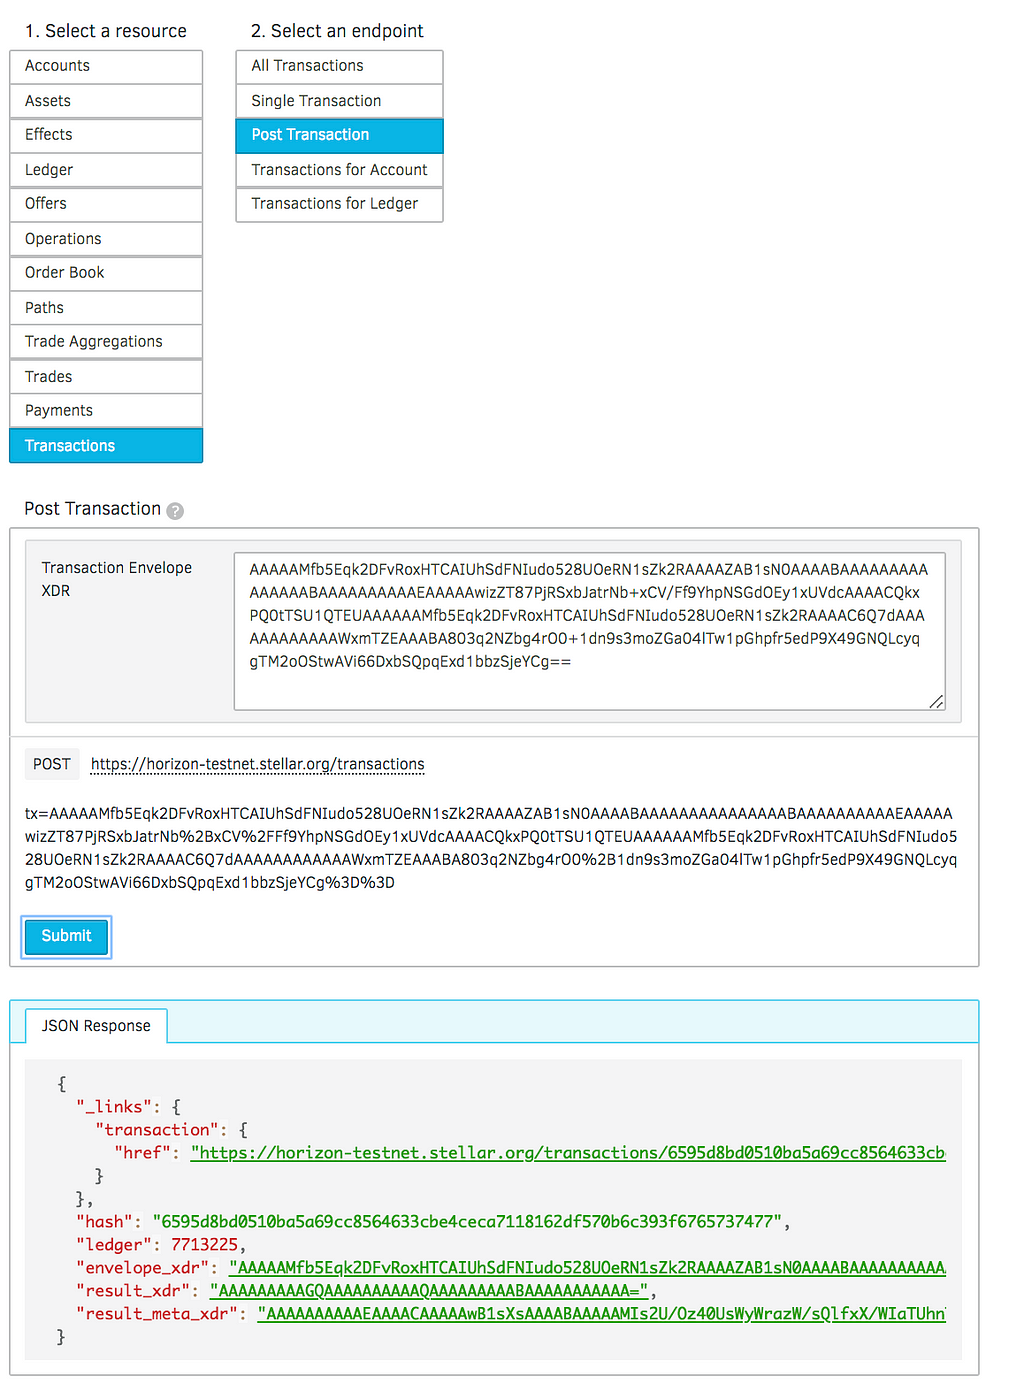
If all goes well, you’ll see a successful transaction like so:
 BOOM!
BOOM!
Ok, so now we have issued 5000 BLOCKSIMPLE tokens on the test net. Woohoo!
Lock the Issuer Account
Ok, now that 5000 BLOCKSIMPLE tokens exist, it’s time to lock the token supply. This is done using the multi-sig options in Stellar. We’re going to use a transaction called “Set Options”.
Using this, we are going to set the “weight” of the account to zero and the minimum weight needed to “1”. This way the account can no longer execute transactions.
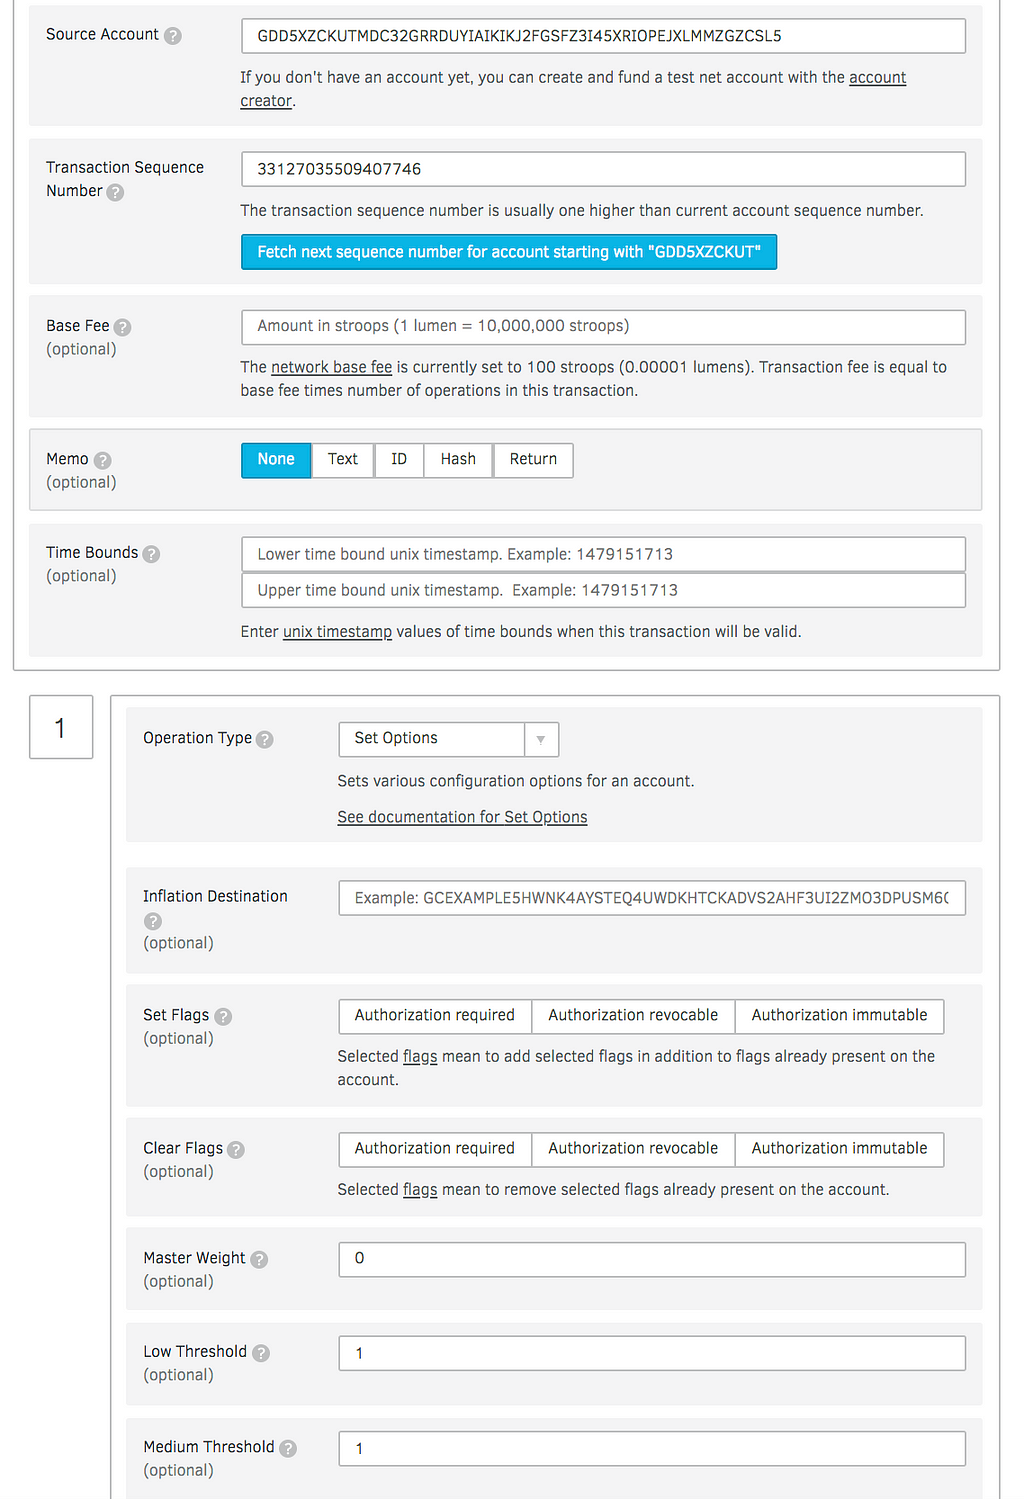
Sign the transaction like before, and you are done!
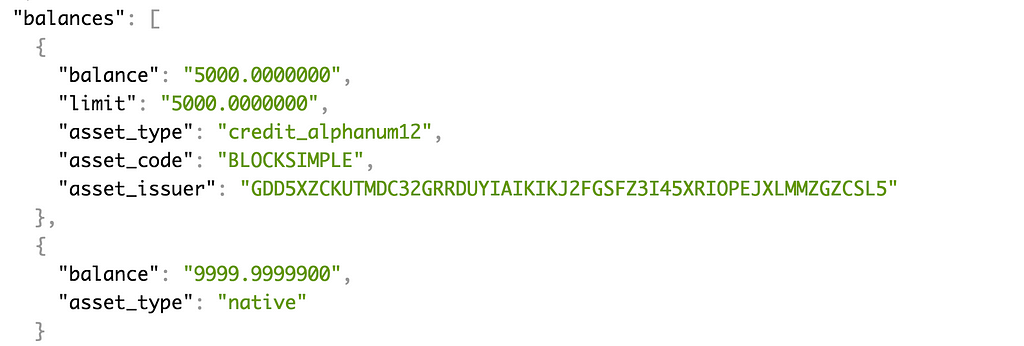
To see the token exists on the testnet, here is a link to the Distribution account:
As you can see, it has 5000 BLOCKSIMPLE tokens.
Congratulations! You just issued your first ever custom Stellar Token! Now comes the hard part: building an ecosystem around your token. That’s a tutorial for another day.
About Brenn
Brenn is a co-founder of BlockSimple. To find out more about him and his firm check out http://blocksimple.solutions
 About BlockSimple
We think Blockchain technology can change the world, but only if it works for ordinary people and organizations. We’re devoted to making Blockchain… simple!
How to make a custom token on Stellar. was originally published in Hacker Noon on Medium, where people are continuing the conversation by highlighting and responding to this story.
Publication date
Disclaimer
The views and opinions expressed in this article are solely those of the authors and do not reflect the views of Bitcoin Insider. Every investment and trading move involves risk - this is especially true for cryptocurrencies given their volatility. We strongly advise our readers to conduct their own research when making a decision.