Latest news about Bitcoin and all cryptocurrencies. Your daily crypto news habit.
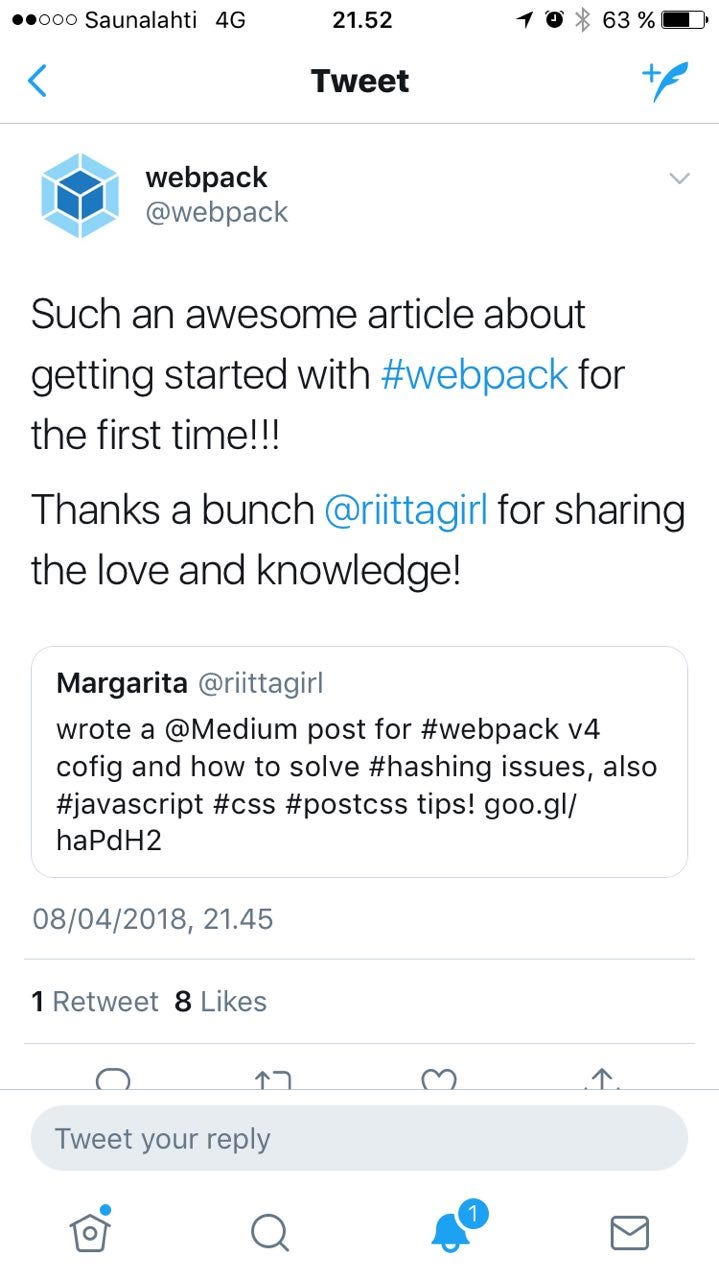
Spoiler: there is no right way. #justwebpackthings Original photo: https://www.instagram.com/p/BhPo4pqBytk/?taken-by=riittagirlThanks for giving my tutorial so much feedback. I am proud to say that Webpack has twitted about it the other day and it was officially approved my a couple of contributors!
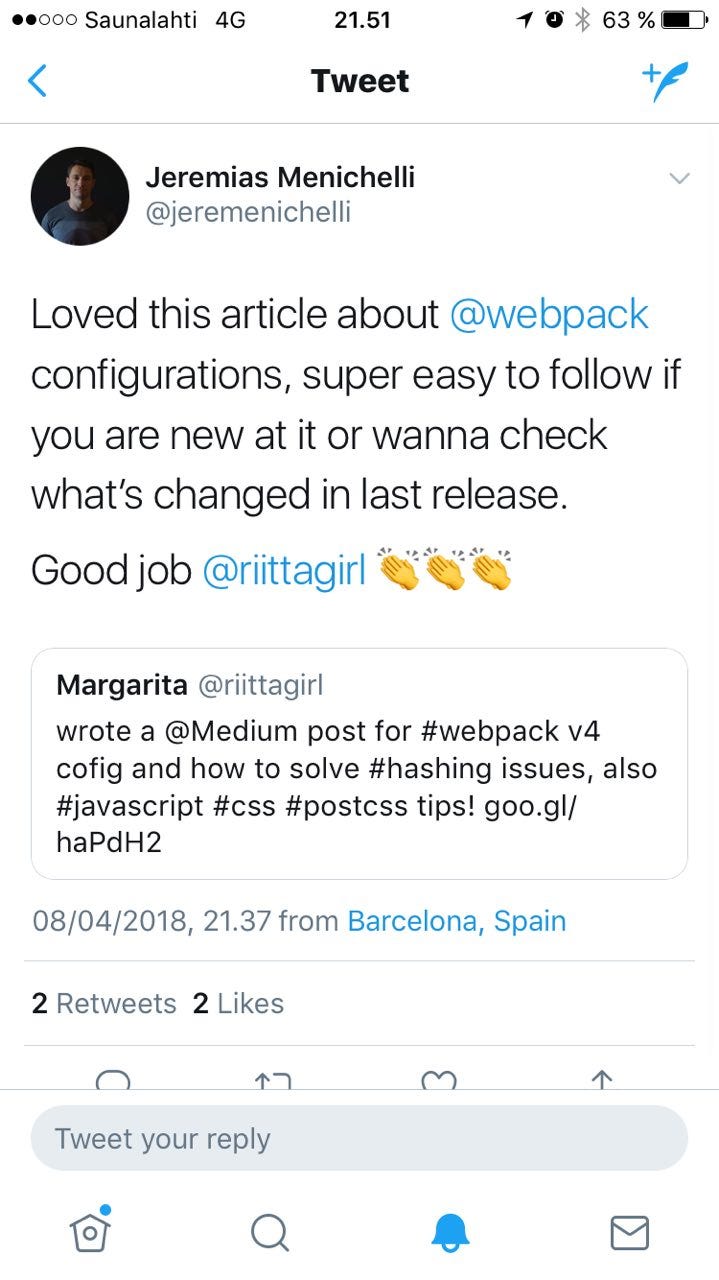
 thanks!
Original photo: https://www.instagram.com/p/BhPo4pqBytk/?taken-by=riittagirlThanks for giving my tutorial so much feedback. I am proud to say that Webpack has twitted about it the other day and it was officially approved my a couple of contributors!thanks!
There are a million tutorials online, so you probably have seen a thousand different ways to configure Webpack file. And all of them will be working examples. Why is it so? Webpack itself has been evolving really fast and a lot of loaders and plugins have to keep up. This is a major reason why the configuration files are so different: with a different version combination of the same tools things might work, or break.
Let me just say one thing, and this is my sincere opinion: a lot of people have been complaining about webpack and how cumbersome it is. This is true in many ways, although I have to say with my experience of working with gulp and grunt, you stumble upon the same type of errors there too, meaning that when you use npm modules, it’s inevitable that some versions would be incompatible.
Webpack 4 so far is the popular module bundler that has just undergone a massive update. There is a lot of new things it has to offer, such as zero configuration, reasonable defaults, performance improvement, optimisation tools out of the box.
If you are completely new to webpack, a great way to start would be to read the docs. Webpack has a pretty nice documentation with many parts explained, so I will go through them very briefly.
Zero config: webpack 4 does not require a configuration file, this is new for the version 4. Webpack kinda grows step by step, so there is no need to do a monstrous configuration from the start.
Performance improvement: webpack 4 is the fastest version of webpack so far.
Reasonable defaults: webpack 4 main concepts are entry, output, loaders, plugins. I will not cover these in details, although the difference between loaders and plugins is very vague. It all depends on how library author has implemented it.
Core concepts
Entry
This should be your .js file. Now you will probably see a few configurations where people include .scss or .css file there. This is a major hack and can lead to a lot of unexpected errors. Also sometimes you see an entry with a few .js files. While some solutions allow you to do so, I would say it usually adds more complexity and only do it when you really know why you are doing it.
Output
This is your build/ or dist/ or wateveryounameit/ folder where your end js file will be hosted. This is your end result comprised of modules.
Loaders
They mostly compile or transpile your code, like postcss-loader will go through different plugins. You will see it later.
Plugins
Plugins play a vital role in outputting your code into files.
Quickstart
Create a new directory and move into it:
mkdir webpack-4-tutorialcd webpack-4-tutorial
Initialize a package.json :
npm init
We need to download webpack v4 as a module and webpack-cli to run it from your terminal.
npm install webpack webpack-cli --save-dev
Make sure you ave version 4 installed, if not, you can explicitly specify it in your package.json file. Now open up package.json and add a build script:
“scripts”: {“dev”: “webpack”
}
You will most likely see a warning:
WARNING in configuration
The ‘mode’ option has not been set, webpack will fallback to ‘production’ for this value. Set ‘mode’ option to ‘development’ or ‘production’ to enable defaults for each environment.
You can also set it to ‘none’ to disable any default behavior. Learn more: https://webpack.js.org/concepts/mode/
Webpack 4 modes
You need to edit your script to contain mode flag:
“scripts”: {“dev”: “webpack --mode development”
}
ERROR in Entry module not found: Error: Can’t resolve ‘./src’ in ‘~/webpack-4-quickstart’
This means webpack is looking for a folder .src/ with an index.js file. This is a default behaviour for webpack 4 since it requires zero configuration.
Let`s go create a directory with a .js file like this ./src/index.js and put some code there.
console.log(“hello, world”);
Now run the dev script:
npm run dev
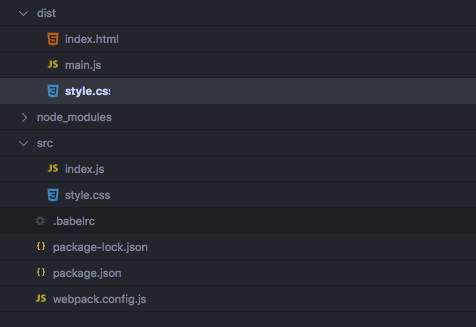
Now you have a ./dist/main.js directory. This is great since we know our code compiled. But what did just happen?
By default, webpack requires zero configuration meaning you do not have to fiddle with webpack.config.js to get started using it. Because of that, it had to assume some default behaviour, such that it will always look for ./src folder by default and index.js in it and output to ./dist/main.js main.js is your compiled file with dependencies.
Having 2 configuration files is a common practice in webpack, especially in big projects. Usually you would have one file for development and one for production. In webpack 4 you have modes: production and development. That eliminates the need for having two files (for medium-sized projects).
“scripts”: {“dev”: “webpack --mode development”,
“build”: “webpack --mode production”
}
If you paid close attention, you have checked your main.js file and saw it was not minified.
I will use build script in this example since it provides a lot of optimisation out of the box, but feel free to use any of them from now on. The core difference between build and dev scripts is how they output files. Build is created for production code. Dev is created for development, meaning that it supports hot module replacement, dev server, and a lot of things that assist your dev work.
You can override defaults in npm scripts easily, just use flags:
“scripts”: {“dev”: “webpack --mode development ./src/index.js --output ./dist/main.js”,
“build”: “webpack --mode production ./src/index.js --output ./dist/main.js”
}
This will override the default option without having to configure anything yet.
As an exercise, try also these flags:
- — watch flag for enabling watch mode. It will watch your file changes and recompile every time some file has been updated.
“scripts”: {“dev”: “webpack --mode development ./src/index.js --output ./dist/main.js --watch”,
“build”: “webpack --mode production ./src/index.js --output ./dist/main.js --watch”
}
- — entry flag. Works exactly like output, but rewrites the entry path.
Transpile your .js code
Modern JS code is mostly written is ES6, and ES6 is not supported by all the browsers. So you need to transpile it — a fancy word for turn your ES6 code into ES5. You can use babel for that — the most popular tool to transpile things now. Of course, we do not only do it for ES6 code, but for many JS implementations such as TypeScript, React, etc.
npm install babel-core babel-loader babel-preset-env --save-dev
This is the part when you need to create a config file for babel.
nano .babelrc
paste there:
{“presets”: [
“env”
]
}
We have two options for configuring babel-loader:
- using a configuration file webpack.config.js
- using --module-bind in your npm scripts
You can technically do a lot with new flags webpack introduces but I would prefer webpack.config.js for simplicity reasons.
Configuration file
Although webpack advertises itself as a zero-configuration platform, it mostly applies to general defaults such as entry and output.
At this point we will create webpack.config.js with the following content:
// webpack v4
const path = require('path');module.exports = { entry: { main: './src/index.js' }, output: { path: path.resolve(__dirname, 'dist'), filename: 'main.js' }, module: { rules: [ { test: /\.js$/, exclude: /node_modules/, use: { loader: "babel-loader" } } ] }};also we will remove flags from our npm scripts now.
“scripts”: { “build”: “webpack --mode production”, “dev”: “webpack --mode development”},Now when we run npm run devit should output us a nice minified .js file into ./dist/main.js If not, try re-installing babel-loader.
The most common pattern of webpack is to use it to compile react application. While this is true, we will not concentrate on React part in this tutorial since I want it to be framework agnostic. Instead, I will show you how to proceed and create your .html and .css configuration.
HTML and CSS imports
Lets create a small index.html file first in our ./dist folder
<html> <head><link rel="stylesheet" href="style.css"> </head> <body> <div>Hello, world!</div> <script src="main.js"></script> </body></html>
As you can see, we are importing here style.css Lets configure it! As we agreed, we ca only have one entry point for webpack. Sow were do we put our css to?
Create a style.css in our ./src folder
div { color: red;}Do not forget to include it into your .js file:
import "./style.css";console.log("hello, world");In webpack create a new rule for css files:
// webpack v4const path = require('path');const ExtractTextPlugin = require('extract-text-webpack-plugin');module.exports = { entry: { main: './src/index.js' }, output: { path: path.resolve(__dirname, 'dist'), filename: 'main.js' }, module: { rules: [ { test: /\.js$/, exclude: /node_modules/, use: { loader: "babel-loader" } },{ test: /\.css$/, use: ExtractTextPlugin.extract( { fallback: 'style-loader', use: ['css-loader'] }) } ] }};in terminal run
npm install extract-text-webpack-plugin --save-devnpm install style-loader css-loader --save-dev
We need yo use extract text plugin to compile our .css. As you can see, we also added a new rule for .css.
A quick description of how rules usually work:
{test: /\.YOUR_FILE_EXTENSION$/,exclude: /SOMETHING THAT IS THAT EXTENSION BUT SHOULD NOT BE PROCESSED/, use: { loader: "loader for your file extension or a group of loaders" }}We need to use ExtractTextPlugin because webpack be default only understands .js format. ExtractTextPlugin gets your .css and extracts it into a separate .css file in your ./dist directory.
Spoiler: in certain articles, you will hear that ExtractTextPlugin does not work with webpack 4 but it worked for me :) It proves my point of modules ambiguity in set-up and if it absolutely does not work for you, you can switch to MiniCssExtractPlugin. I will show you how to configure another one later in this article.
// webpack v4const path = require('path');const ExtractTextPlugin = require('extract-text-webpack-plugin');module.exports = { entry: { main: './src/index.js' }, output: { path: path.resolve(__dirname, 'dist'), filename: 'main.js' }, module: { rules: [ { test: /\.js$/, exclude: /node_modules/, use: { loader: "babel-loader" } }, { test: /\.css$/, use: ExtractTextPlugin.extract( { fallback: 'style-loader', use: ['css-loader'] }) } ] }, plugins: [ new ExtractTextPlugin({filename: 'style.css'}) ]};;Since version 4, Webpack 4 has problems with this plugin, so you might run into this error:
Webpack 4 compatibility · Issue #701 · webpack-contrib/extract-text-webpack-plugin
To fix it, you can run
npm install -D extract-text-webpack-plugin@next
Pro tip: google errors you get and try to find similar question in Github issues or just ask a question on StackOverflow.
After that, your css code should compile to ./dist/style.css
At this point in my package.json my dev dependencies look like this:
"devDependencies": {"babel-core": "^6.26.0", "babel-loader": "^7.1.4", "babel-preset-env": "^1.6.1", "css-loader": "^0.28.11", "extract-text-webpack-plugin": "^4.0.0-beta.0", "style-loader": "^0.20.3", "webpack": "^4.4.1", "webpack-cli": "^2.0.12" }Please, note that another combination might not work since even updating webpack-cli v2.0.12 to 2.0.13 can break it. #justwebpackthings
So now it should output your style.css into ./dist folder.
Configure support for SCSS
It is very common to develop websites with SASS and POSTCSS, they are very helpful. So we will include support for SASS first. Let`s rename our ./src/style.css and create another folder to store .scss files in there. Now we need to add support for .scss formatting.
npm install node-sass sass-loader --save-dev
replace style.scss with ./scss/main.scss in your .js file.
HTML template
Now lets create .html file template. Add index.html to ./src file with exactly the same structure.
<html> <head><link rel="stylesheet" href="style.css"> </head> <body> <div>Hello, world!</div> <script src="main.js"></script> </body></html>
We will need to use html plugin for this file in order to use it as a template.
npm install html-webpack-plugin --save-dev
Add it to your webpack file:
// webpack v4const path = require('path');const ExtractTextPlugin = require('extract-text-webpack-plugin');const HtmlWebpackPlugin = require('html-webpack-plugin');module.exports = { entry: { main: './src/index.js' }, output: { path: path.resolve(__dirname, 'dist'), filename: 'main.js' }, module: { rules: [ { test: /\.js$/, exclude: /node_modules/, use: { loader: "babel-loader" } }, { test: /\.scss$/, use: ExtractTextPlugin.extract( { fallback: 'style-loader', use: ['css-loader', 'sass-loader'] }) } ] }, plugins: [ new ExtractTextPlugin( {filename: 'style.css'} ),new HtmlWebpackPlugin({ inject: false, hash: true, template: './src/index.html', filename: 'index.html' }) ]};Now your file from ./src/index.html is a template for your final index.html file. To check that everything works, delete every file from ./dist folder and the folder itself.
rm -rf /distnpm run dev
You will see that ./dist folder was created on its own and there are three files: index.html, style.css, script.js.
Caching and Hashing
One of the most common problems in development is implementing caching. It is very important to understand how it works since you want your users to always have the best latest version of your code.
Since this blogpost is mainly about webpack configuration, we will not concentrate on how caching works in details. I will just say that one of the most popular ways to solve caching problems is adding a hash number to asset files, such style.css and script.js. You can read about it here. Hashing is needed to teach our browser to only request changed files.
Webpack 4 has a prebuilt functionality for it implemented via chunkhash. It can be done with:
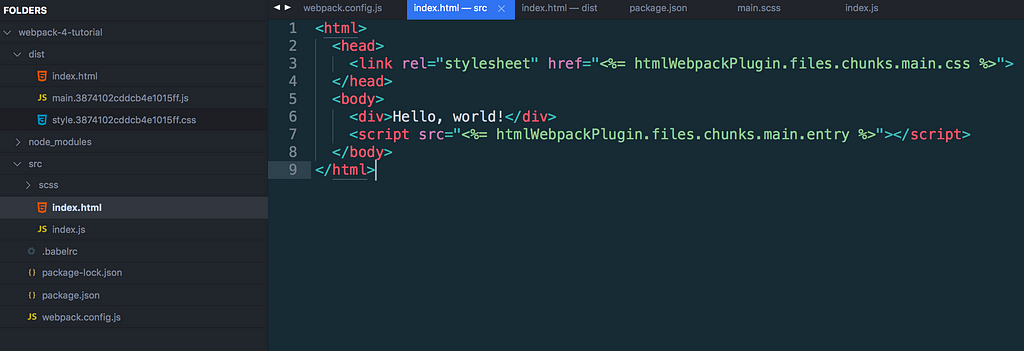
// webpack v4const path = require('path');const ExtractTextPlugin = require('extract-text-webpack-plugin');const HtmlWebpackPlugin = require('html-webpack-plugin');module.exports = { entry: { main: './src/index.js' }, output: { path: path.resolve(__dirname, 'dist'),filename: '[name].[chunkhash].js' }, module: { rules: [ { test: /\.js$/, exclude: /node_modules/, use: { loader: "babel-loader" } }, { test: /\.scss$/, use: ExtractTextPlugin.extract( { fallback: 'style-loader', use: ['css-loader', 'sass-loader'] }) } ] }, plugins: [ new ExtractTextPlugin( {filename: 'style.[chunkhash].css', disable: false, allChunks: true} ), new HtmlWebpackPlugin({ inject: false, hash: true, template: './src/index.html', filename: 'index.html' }), ]};In your ./src/index.html file add
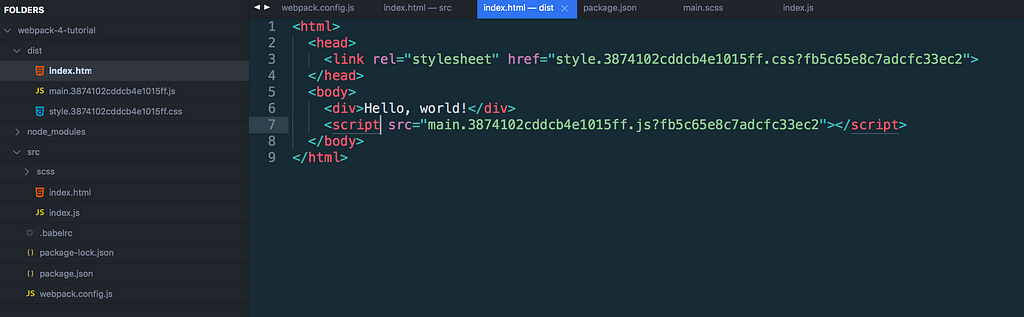
<html> <head> <link rel="stylesheet" href="<%=htmlWebpackPlugin.files.chunks.main.css %>"> </head> <body> <div>Hello, world!</div><script src="<%= htmlWebpackPlugin.files.chunks.main.entry %>"></script> </body></html>
This syntax will teach your template to use hashed files. This is a new feature implemented after this issue:
We will use htmlWebpackPlugin.files.chunks.main pattern described there.
now in our ./dist file index.html
Now if we do not change anything in our .js and. css file and run
npm run dev
no matter how many times you run it, the numbers in hashes should be identical to each other in both files.
Problem with hashing and how to solve it
Although we have the working implementation here, it is not perfect yet. What if we change some code in our .scss file? Go ahead, change some scss there and run dev script again. Now the new file hash is not generated
What if we add a new console.log to our .js file like this:
import "./style.css";console.log("hello, world");console.log("Hello, world 2");If you run a dev script again, you will see that hash number has been updated in both files.
This issue is known and there is even a stack overflow question about it:
Updating chunkhash in both css and js file in webpack
Now how to fix that?
After trying a lot of plugins that claim they solve this problem I have finally came to two types of solution:
Solution 1
Replace [chukhash] with just [hash] in .css extract plugin. This was one of the solutions to the issue. This appears to be a conflict with webpack 4.3 which introduced a [contenthash] variable of its own. In conjunction, use this plugin: webpack-md5-hash
Now if you make changes to your main.scss file and run dev script, only a new style.css should be generated with a new hash.
// webpack v4const path = require('path');const ExtractTextPlugin = require('extract-text-webpack-plugin');const HtmlWebpackPlugin = require('html-webpack-plugin');const WebpackMd5Hash = require('webpack-md5-hash');module.exports = { entry: { main: './src/index.js' }, output: { path: path.resolve(__dirname, 'dist'),filename: '[name].[chunkhash].js' }, module: { rules: [ { test: /\.js$/, exclude: /node_modules/, use: { loader: "babel-loader" } }, { test: /\.scss$/, use: ExtractTextPlugin.extract( { fallback: 'style-loader', use: ['css-loader', 'sass-loader'] }) } ] }, plugins: [ new ExtractTextPlugin( {filename: 'style.[hash].css', disable: false, allChunks: true} ), new HtmlWebpackPlugin({ inject: false, hash: true, template: './src/index.html', filename: 'index.html' }), new WebpackMd5Hash() ]};Now lets test our .js files. Now both files change hash.
Solution 2
There might also be some conflicts still, so now lets try mini-css-extract plugin.
Mini-CSS plugin
The Mini CSS plugin is meant to replace extract-text plugin and provide you with better future compatibility.
I have restructured my webpack file to compile style.css with /mini-css-extract-plugin and it works for me.
// webpack v4const path = require('path');// const ExtractTextPlugin = require('extract-text-webpack-plugin');const HtmlWebpackPlugin = require('html-webpack-plugin');const WebpackMd5Hash = require('webpack-md5-hash');const MiniCssExtractPlugin = require("mini-css-extract-plugin");module.exports = { entry: { main: './src/index.js' }, output: { path: path.resolve(__dirname, 'dist'), filename: '[name].[chunkhash].js' }, module: { rules: [ { test: /\.js$/, exclude: /node_modules/, use: { loader: "babel-loader" } },{ test: /\.scss$/, use: [ 'style-loader', MiniCssExtractPlugin.loader, 'css-loader', 'sass-loader'] } ] }, plugins: [// new ExtractTextPlugin( // {filename: 'style.[hash].css', disable: false, allChunks: true } // ), new MiniCssExtractPlugin({ filename: 'style.[contenthash].css', }), new HtmlWebpackPlugin({ inject: false, hash: true, template: './src/index.html', filename: 'index.html' }), new WebpackMd5Hash() ]};Now when I edit main.scss a new hash for style.css is generated. And when I edit css only css hash changes and when I edit ./src/script.js only script.js hash changes!
As Nikolay Volkov pointed out, ‘style-loader’ might not be necessary anymore since MiniCssExtractPlugin.loader does the same. Though it might be true I would still recommend to leave it for the fallback.
Integrating PostCSS
To have out output .css polished, we can add PostCSS on top.
PostCSS provides you with autoprefixer, cssnano and other nice and handy stuff. I will sow what I am using on a daily basis. We will need postcss-loader. We will also install autoprefixer as we will need it later.
npm install postcss-loader --save-devnpm i -D autoprefixer
Spoiler: you do not have to use webpack to benefit from PostCSS, it as a pretty decent post-css-cli plugin that allows you to use it in npm script.
Create postcss.config.js where you require relevant plugins, paste
module.exports = { plugins: [ require('autoprefixer') ]}Our webpack.config.js now should look like this:
// webpack v4const path = require('path');// const ExtractTextPlugin = require('extract-text-webpack-plugin');const HtmlWebpackPlugin = require('html-webpack-plugin');const WebpackMd5Hash = require('webpack-md5-hash');const MiniCssExtractPlugin = require("mini-css-extract-plugin");module.exports = { entry: { main: './src/index.js' }, output: { path: path.resolve(__dirname, 'dist'), filename: '[name].[chunkhash].js' }, module: { rules: [ { test: /\.js$/, exclude: /node_modules/, use: { loader: "babel-loader" } }, { test: /\.scss$/,use: [ 'style-loader', MiniCssExtractPlugin.loader, 'css-loader', 'postcss-loader', 'sass-loader'] } ] }, plugins: [ new CleanWebpackPlugin('dist', {} ), // new ExtractTextPlugin( // {filename: 'style.[hash].css', disable: false, allChunks: true } // ), new MiniCssExtractPlugin({ filename: 'style.[contenthash].css', }), new HtmlWebpackPlugin({ inject: false, hash: true, template: './src/index.html', filename: 'index.html' }), new WebpackMd5Hash() ]};Please, pay attention to the order of plugins we use for our .scss
use: [ 'style-loader', MiniCssExtractPlugin.loader, 'css-loader', 'postcss-loader', 'sass-loader']
The loader uses plugins from the end to the beginning.
You can test autoprefixer by adding more code to your .scss files and checking the output. There is also a way to fix the output by specifying which browser you want to support in the .browserslistrc file.
I would direct you to https://www.postcss.parts/ to explore the plugins available for PostCSS, such as:
I will use cssnano to minify my output file and css-mqpacker to arrange my media queries. I also have received some messages that:
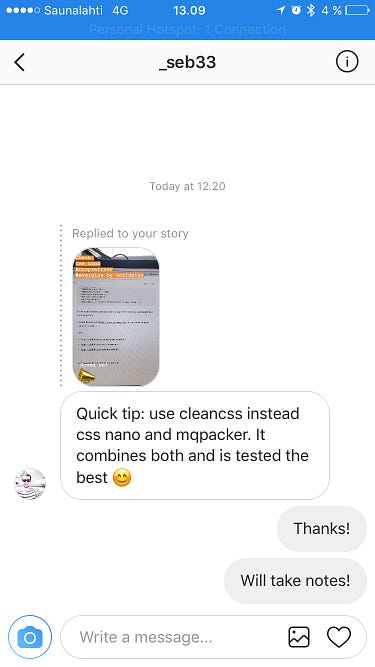
Feel free to try cleancss if you want to.
Version controlling
Your package.json at this point should have the following structure:
{ “name”: “post”, “version”: “1.0.0”, “description”: “”, “main”: “index.js”, “scripts”: { “build”: “webpack — mode production”, “dev”: “webpack — mode development” }, “author”: “”, “license”: “ISC”, “devDependencies”: { “autoprefixer”: “^8.2.0”, “babel-core”: “^6.26.0”, “babel-loader”: “^7.1.4”, “babel-preset-env”: “^1.6.1”, “clean-webpack-plugin”: “^0.1.19”, “css-loader”: “^0.28.11”, “html-webpack-plugin”: “^3.2.0”, “mini-css-extract-plugin”: “^0.4.0”, “node-sass”: “^4.8.3”, “postcss-loader”: “^2.1.3”, “sass-loader”: “^6.0.7”, “style-loader”: “^0.20.3”, “webpack”: “^4.4.1”, “webpack-cli”: “^2.0.13”, “webpack-md5-hash”: “0.0.6” }}to keep your dependencies in place, I recommend using yarn instead of npm to install modules. Long story short, this will lock every package and when you do node modules reinstallation, you will avoid many incompatibility surprises.
Keeping it clean and fresh
We can try importing clean-webpack-plugin to clean our ./dist folder before we regenerate files.
// webpack v4const path = require('path');const HtmlWebpackPlugin = require('html-webpack-plugin');const WebpackMd5Hash = require('webpack-md5-hash');const MiniCssExtractPlugin = require("mini-css-extract-plugin");const CleanWebpackPlugin = require('clean-webpack-plugin');module.exports = { entry: { main: './src/index.js' }, output: { path: path.resolve(__dirname, 'dist'), filename: '[name].[chunkhash].js' }, module: { rules: [ { test: /\.js$/, exclude: /node_modules/, use: { loader: "babel-loader" } }, { test: /\.scss$/, use: [ 'style-loader', MiniCssExtractPlugin.loader, 'css-loader', 'postcss-loader', 'sass-loader'] } ] }, plugins: [ new CleanWebpackPlugin('dist', {} ), new MiniCssExtractPlugin({ filename: 'style.[contenthash].css', }), new HtmlWebpackPlugin({ inject: false, hash: true, template: './src/index.html', filename: 'index.html' }), new WebpackMd5Hash() ]};Now that we have our configuartion clean and neat, we can rock on!
Here I have provided you with my configuration file and my way to configure it step by step. Note: since a lot of npm dependencies might change by the time you read this the same config might not work for you! I kindly ask you to leave your errors in the comments below so that I can edit it later. Today is 05.04.2018
More resources on webpack v4:
- Webpack 4 Tutorial: from 0 Conf to Production Mode (Updated)
- Yarn vs npm: Everything You Need to Know - SitePoint
Please, Subscribe and Clap for this article! Thanks!
A tale of Webpack 4 and how to finally configure it in the right way was originally published in Hacker Noon on Medium, where people are continuing the conversation by highlighting and responding to this story.
Publication date
Disclaimer
The views and opinions expressed in this article are solely those of the authors and do not reflect the views of Bitcoin Insider. Every investment and trading move involves risk - this is especially true for cryptocurrencies given their volatility. We strongly advise our readers to conduct their own research when making a decision.