Latest news about Bitcoin and all cryptocurrencies. Your daily crypto news habit.
Have you ever wondered how to use React Context API? This tutorial will show you how to use it to build a simple multilingual website. In this part, we will start by creating navigation for our website. Then, we will build three simple pages. After that, we will prepare files for translation and make our website multilingual. I hope you will enjoy it. Now, let’s begin.
Table of Contents:
Adding Header component
Adding universal styles
Creating the homepage
Building the about page
Creating a minimalist portfolio page
Adding the translations
Closing thoughts on React Context and building a multilingual website
How to Use React Context to Build a Multilingual Website Part 1.
Project outline:
react-context-multilingual-website├── node_modules/├── public/├── src/│ └── app/│ └── components/│ └── header.jsx│ └── pages/│ └── About.jsx│ └── Home.jsx│ └── Portfolio.jsx│ └── styles/│ └── components/│ └── header.css│ └── links.css│ └── pages/│ └── about.css│ └── base.css│ └── grid.css│ └── layout.css│ └── Main.jsx│ └── translations/│ └── cz.json│ └── de.json│ └── en.json│ └── fr.json│ └── context.jsx│ └── index.js│ └── registerServiceWorker.js├── .env├── package.json└── yarn.lock
Adding Header component
We finished the previous part by creating Main component, inside Main.jsx file. As a result, we have basically everything we need to start working on our website. React Context is prepared and routes are set. Probably the best way to continue will be by creating the Header component for our website. There are several reasons why we should start with Header component.
Reason number one is that Header will be a relatively simple component, if we look away from the React Context for a moment. Header component will contain a list with three separate list items with links, one for each page. Under these links will be one additional list item wrapping four links, one for each language variation of our website. Finally, there will be a menu button.
The reason number two is that Header component will allow us to test React Context as well as translations for our website. As you may remember, we passed React Context to Header component as context prop, in Main.jsx. We will use this props now for a couple of things. First, we will use it to show and hide the navigation with isNavOpen key stored in state and toggleNav method, both provided by React Context.
And, second, we will use the changeLanguage to switch between language variations of our website when visitor clicks on one of the links dedicated to language.
Now, let’s quickly discuss how will the translations work. This will be simple. We will use if statements to check the language key stored inside the state of React Context, passed through context prop. We will compare the value of the language key with three strings, ‘cz’, ‘de’ and ‘fr’. If match is found, we will load specific string from translation JSON file.
We will use English as default language. So, when there is no match with any of the strings, our website will switch to English. We will use this exact mechanism to switch between strings variations, when the visitor decides to the language, on the rest of our website. The only difference is that the rest of the website will use Consumer component from React Context, not React prop.
Side note: One thing we need to keep in mind is that we will need to import translation files in every component that should work with translated strings. Since we want all pages to be translated, we will need to import these JSONs on every page. Don’t worry. The code for imports will be always the same. So, “copy & paste” will do the work.
// src/app/components/Header.jsximport React, { Component } from 'react'import { Link } from 'react-router-dom'// Import CSSimport 'app/styles/components/header.css'import 'app/styles/components/links.css'// Import translationsimport * as translationCZ from 'translations/cz'import * as translationDE from 'translations/de'import * as translationEN from 'translations/en'import * as translationFR from 'translations/fr'class Header extends Component { render() { return ( <header className="header"> <div className="container-fluid"> <nav className="nav-wrapper"> {this.props.context.state.isNavOpen && <div className="js-nav nav"> <ul className="nav-list"> <li> <Link className='link' to="/" onClick={this.props.context.toggleNav}> { (() => { if (this.props.context.state.language === 'cz') { return translationCZ.nav.home } else if (this.props.context.state.language === 'de') { return translationDE.nav.home } else if (this.props.context.state.language === 'fr') { return translationFR.nav.home } else { return translationEN.nav.home } })() } </Link> </li> <li> <Link className='link' to="/portfolio" onClick={this.props.context.toggleNav}> { (() => { if (this.props.context.state.language === 'cz') { return translationCZ.nav.portfolio } else if (this.props.context.state.language === 'de') { return translationDE.nav.portfolio } else if (this.props.context.state.language === 'fr') { return translationFR.nav.portfolio } else { return translationEN.nav.portfolio } })() } </Link> </li> <li> <Link className='link' to="/about" onClick={this.props.context.toggleNav}> { (() => { if (this.props.context.state.language === 'cz') { return translationCZ.nav.about } else if (this.props.context.state.language === 'de') { return translationDE.nav.about } else if (this.props.context.state.language === 'fr') { return translationFR.nav.about } else { return translationEN.nav.about } })() } </Link> </li> <li className="nav-languages"> <a className="link" onClick={this.props.context.changeLanguage} data-language="en" > EN </a> <span className="nav-divider">/</span> <a className="link" onClick={this.props.context.changeLanguage} data-language="cz" > CZ </a> <span className="nav-divider">/</span> <a className="link" onClick={this.props.context.changeLanguage} data-language="de" > DE </a> <span className="nav-divider">/</span> <a className="link" onClick={this.props.context.changeLanguage} data-language="fr" > FR </a> </li> </ul> </div>} {<button className={this.props.context.state.isNavOpen ? 'nav-toggler nav-toggler--open' : 'nav-toggler'} type="button" aria-label="Toggle navigation" onClick={this.props.context.toggleNav}> <span /> <span /> <span /> </button>} </nav> </div> </header> ) }}export default HeaderOne more thing. We should also add some styles. This will relatively fast. As you can see on the code for Header component above, we are using conditional loading of for rendering the whole div with class .nav. Therefore, we don’t have to care about styles when navigation is hidden. If it is hidden, it is not rendered at all. It doesn’t exist in DOM.
All we need are styles for situation when visitor actually clicks on the menu button and navigation is rendered. Let’s discuss how will the navigation look like. Open navigation will take the whole real estate of the screen. It will be full-width and full-height, with fixed positioning. We will use dark gray for background and white for links. On hover, color of links will change to orange.
// src/app/styles/components/header.cssheader { position: fixed; top: 0; left: 0; padding-top: 16px; padding-bottom: 16px; width: 100%;}.nav-is-open { overflow: hidden;}.nav-is-open header { position: static;}/* Styles for navigation */nav,.nav,.nav-list { display: flex; width: 100%; height: 100%;}nav,.nav { position: absolute; top: 0; left: 0; z-index: 999999;}.nav-list { padding: 0; margin: 0; align-items: center; flex-direction: column; justify-content: center; list-style-type: none; background-color: hsla(218.4, 24.3%, 20.2%, 1);}.nav-list li { padding: 0; margin: 0;}.nav-list li + li { margin-top: 8px;}.nav-toggler span,.nav-link { transition: all .25s ease-in-out;}/* Button for mobile menu */.nav-toggler { position: fixed; top: 22px; right: 16px; z-index: 9999999; padding: 0; display: block; width: 28px; height: 22px; background-color: transparent; border: 0; cursor: pointer;}.nav-toggler:focus { outline: 0;}.nav-toggler span { position: absolute; left: 0; display: block; width: 100%; height: 2px; background-color: hsla(0, 100%, 5%, 1);}.nav-toggler:hover span,.nav-is-open .nav-toggler:hover span { background-color: hsla(24.2, 95.3%, 58.6%, 1);}.nav-is-open .nav-toggler span { background-color: hsla(0, 100%, 100%, 1);}.nav-toggler span:first-of-type { top: 0;}.nav-toggler span:nth-of-type(2) { top: 50%; transform: translateY(-50%);}.nav-toggler span:last-of-type { bottom: 0;}.nav-toggler--open span:first-of-type { top: 50%; transform: rotate(45deg) translateY(-50%) translateX(-1%);}.nav-toggler--open span:nth-of-type(2) { opacity: 0;}.nav-toggler--open span:last-of-type { top: 50%; transform: rotate(-45deg) translateY(-50%) translateX(1%);}nav .link { font-size: 32px; color: hsla(0, 100%, 100%, 1);}/* Links for languages */.nav .nav-languages { margin-top: 16px;}.nav-languages .link,.nav-divider { font-size: 18px;}.nav-divider { margin-right: 8px; margin-left: 8px; color: hsla(0, 100%, 100%, 1); cursor: default;}One small additional stylesheet for Link component. This component doesn’t exist anywhere in React code and we will not create it. All we need are just some custom styles for improving the visual part of links. Creating a standalone React component is not necessary. So, let’s just create a small CSS stylesheet and import it when we need it.
First, we will remove the default underline. After that, we will set cursor property to pointer. The default color of links will be dark gray. When visitor hover over the link the color will change to orange. Finally, let’s add slight transition to make the change of color smoother.
// src/app/styles/components/links.css.link { text-decoration: none; color: hsla(0, 100%, 3%, 1); cursor: pointer; transition: color .25s ease-in-out;}.link:hover { color: hsla(24.2, 95.3%, 58.6%, 1);}Adding universal styles
Before we start working on individual pages, we will need to create a few CSS stylesheet. These will be base.css, grid.css and layout.css. We will use one of those styles repeatedly on some pages, the grid.css. The base.css will contain resets and overrides for default styles. The layout.css will contain styles for page containers and elements used across the website. Let’s start with base.css.
// src/app/styles/base.css@-ms-viewport { width: device-width;}html,body,.root { width: 100%; height: 100%;}html { box-sizing: border-box; font-size: 100%; -ms-overflow-style: scrollbar;}*,*::before,*::after { box-sizing: inherit;}body { position: relative; padding: 0; margin: 0; font: 1rem / 1.15 'Montserrat', sans-serif; background-color: hsla(0, 100%, 100%, 1); -webkit-text-size-adjust: 100%; /* Prevent adjustments of font size after orientation changes in iOS. */}[hidden] { display: none;}.root { position: relative;}a { cursor: pointer;}img { max-width: 100%;}Next will be the layout.css. As we discussed, this stylesheet will contain page containers and styles for elements we will use repeatedly, namely headings. This is how layout.css will look like.
// src/app/styles/layout.css.page { text-align: center; color: hsla(0, 100%, 3%, 1);}.page-absolute { position: absolute; top: 50%; left: 50%; transform: translate(-50%, -50%);}.page-static { margin-top: 60px; padding-bottom: 60px;}.page-heading-h1 { margin-top: 0; font-size: 56px;}.page-heading-h2 { font-size: 32px;}.page-heading-h3,.page-text { font-size: 21px;}.page-heading-h4 { font-size: 18px;}The third and last universal stylesheet will be dedicated to everything related to grid. True, we could merge this stylesheet with layout.css since both are about the layout, technically speak. Anyway, I decided to use some parts of Bootstrap 4 grid, only parts we will need now. This means, styles for container, row and some columns.
// src/app/styles/grid.css.container { padding-right: 15px; padding-left: 15px; margin-right: auto; margin-left: auto; width: 100%;}@media (min-width: 576px) { .container { max-width: 540px; }}@media (min-width: 768px) { .container { max-width: 720px; }}@media (min-width: 992px) { .container { max-width: 960px; }}@media (min-width: 1200px) { .container { max-width: 1140px; }}.container-fluid { padding-right: 15px; padding-left: 15px; margin-right: auto; margin-left: auto; width: 100%;}.row { display: -webkit-box; display: -ms-flexbox; display: flex; -ms-flex-wrap: wrap; flex-wrap: wrap; margin-right: -15px; margin-left: -15px;}.col-md-6,.col-lg-3,.col-lg-4 { position: relative; padding-right: 15px; padding-left: 15px; width: 100%; min-height: 1px;}[class*=col-md]:nth-of-type(n+2) { margin-top: 32px;}@media (min-width: 768px) { .col-md-6 { -ms-flex: 0 0 50%; flex: 0 0 50%; -webkit-box-flex: 0; max-width: 50%; } [class*=col-md]:nth-of-type(n+2) { margin-top: 0; } .col-md-6:nth-of-type(n+3) { margin-top: 32px; }}@media (min-width: 992px) { .col-lg-3 { -ms-flex: 0 0 25%; flex: 0 0 25%; -webkit-box-flex: 0; max-width: 25%; } .col-lg-4 { -ms-flex: 0 0 33.333333%; flex: 0 0 33.333333%; -webkit-box-flex: 0; max-width: 33.333333%; } [class*=col-md]:nth-of-type(3) { margin-top: 0; }}One last thing. Since we will use styles base.css and layout.css on every page, we can import these two stylesheets in index.js. Well, we have to add only import for layout.css because the import for base.css is already in place. So, let’s add it.
// src/index.jsimport React from 'react'import ReactDOM from 'react-dom'import { BrowserRouter } from 'react-router-dom'// Import service workersimport registerServiceWorker from 'registerServiceWorker'// Import context providerimport { MyProvider } from 'context'// Import Main componentimport Main from './app/Main'// Import CSSimport 'app/styles/base.css'import 'app/styles/layout.css'// Create App componentconst App = () => { return ( <MyProvider> <BrowserRouter> <Main /> </BrowserRouter> </MyProvider> )}ReactDOM.render(<App />, document.getElementById('root'))registerServiceWorker()Creating the homepage
With this, we can create the component for homepage. We discussed the way we will use React Context to switch between translation in the section about Header component. In short, we will use if statement to check the language key inside React Context state and load strings from specific translation file. So, the syntax will be similar to the syntax in Header.
There will be one difference between Header component and pages. In Header component, we used props to pass the React Context to the component and then access its content. Pages will use MyContext and Consumer components, we created in context.jsx, with function. As you may remember, we used this approach in Main.jsx in part 1.
This function will accept one argument, the value (or content) of React Context. So, instead of accessing context, as a prop passed to the component, we will access context through the context argument.
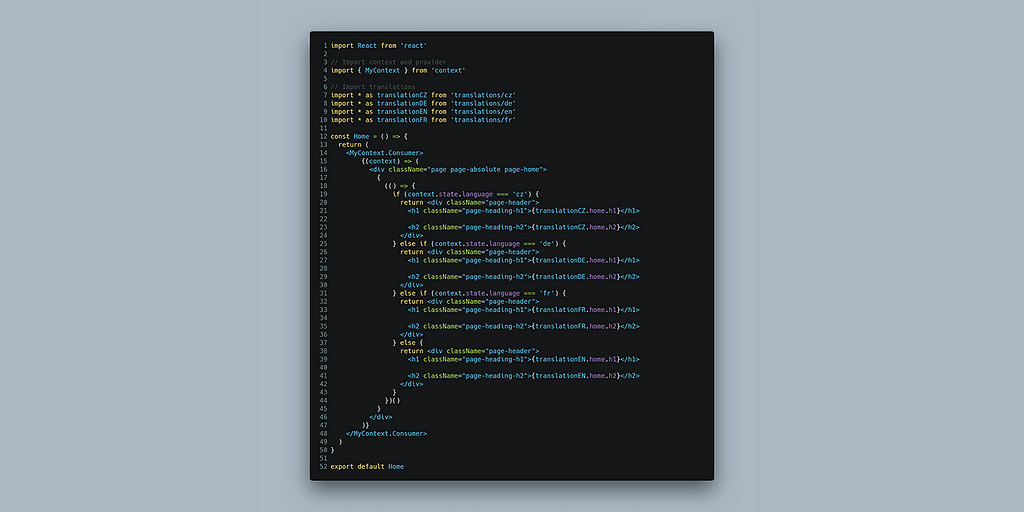
// src/app/pages/Home.jsximport React from 'react'// Import context and providerimport { MyContext } from 'context'// Import translationsimport * as translationCZ from 'translations/cz'import * as translationDE from 'translations/de'import * as translationEN from 'translations/en'import * as translationFR from 'translations/fr'const Home = () => { return ( <MyContext.Consumer> {(context) => ( <div className="page page-absolute page-home"> { (() => { if (context.state.language === 'cz') { return <div className="page-header"> <h1 className="page-heading-h1">{translationCZ.home.h1}</h1> <h2 className="page-heading-h2">{translationCZ.home.h2}</h2> </div> } else if (context.state.language === 'de') { return <div className="page-header"> <h1 className="page-heading-h1">{translationDE.home.h1}</h1> <h2 className="page-heading-h2">{translationDE.home.h2}</h2> </div> } else if (context.state.language === 'fr') { return <div className="page-header"> <h1 className="page-heading-h1">{translationFR.home.h1}</h1> <h2 className="page-heading-h2">{translationFR.home.h2}</h2> </div> } else { return <div className="page-header"> <h1 className="page-heading-h1">{translationEN.home.h1}</h1> <h2 className="page-heading-h2">{translationEN.home.h2}</h2> </div> } })() } </div> )} </MyContext.Consumer> )}export default HomeBuilding the about page
Next let’s put together a simple about page. This page will have one main heading, block of text and three links, for e-mail, Twitter and Dribble. We will skip contact form for now.
// src/app/pages/About.jsximport React from 'react'// Import context and providerimport { MyContext } from 'context'// Import translationsimport * as translationCZ from 'translations/cz'import * as translationDE from 'translations/de'import * as translationEN from 'translations/en'import * as translationFR from 'translations/fr'// Import CSSimport 'app/styles/grid.css'import 'app/styles/components/links.css'import 'app/styles/pages/about.css'const About = () => { return ( <MyContext.Consumer> {(context) => ( <div className="page page-absolute page-about"> <div className="container"> { (() => { if (context.state.language === 'cz') { return <div> <h1 className="page-heading-h2">{translationCZ.about.h1}</h1> <p className="page-text">{translationCZ.about.p}</p> </div> } else if (context.state.language === 'de') { return <div> <h1 className="page-heading-h2">{translationDE.about.h1}</h1> <p className="page-text">{translationDE.about.p}</p> </div> } else if (context.state.language === 'fr') { return <div> <h1 className="page-heading-h2">{translationFR.about.h1}</h1> <p className="page-text">{translationFR.about.p}</p> </div> } else { return <div> <h1 className="page-heading-h2">{translationEN.about.h1}</h1> <p className="page-text">{translationEN.about.p}</p> </div> } })() } <div className="about__contact"> <div className="row"> <div className="col-md-6 col-lg-4"> <h2 className="page-heading-h4"> <span>E-mail:</span> <br/> <a className="link" href="mailto:email@jakestuart.com">email@jakestuart.com</a> </h2> </div> <div className="col-md-6 col-lg-4"> <h2 className="page-heading-h4"> <span>Twitter:</span> <br/> <a className="link" href="">@jake_stuart1359</a> </h2> </div> <div className="col-md-6 col-lg-4"> <h2 className="page-heading-h4"> <span>Dribbble:</span> <br/> <a className="link" href="">jake_stuart1359</a> </h2> </div> </div> </div> </div> </div> )} </MyContext.Consumer> )}export default AboutOne more thing. Unlike the rest of pages, About page will require some custom styles. We will need to add some to make it work and look better on mobile devices. On smaller screen, the content can be pushed outside the real estate of the page because the container is positioned absolutely. Adding some top and bottom padding will solve this issue.
// src/app/styles/pages/about.jsx@media (max-width: 767px) { .page-about { padding-top: 90px; padding-bottom: 60px; }}Creating a minimalist portfolio page
This will be the third and last page for our website. Portfolio page will contain one main and one secondary heading and six images (examples of work) presented inside 9×9 grid.
// src/app/pages/Portfolio.jsximport React from 'react'// Import context and providerimport { MyContext } from 'context'// Import translationsimport * as translationCZ from 'translations/cz'import * as translationDE from 'translations/de'import * as translationEN from 'translations/en'import * as translationFR from 'translations/fr'const Portfolio = () => { return ( <div className="page page-portfolio page-static"> <div className="container"> <MyContext.Consumer> {(context) => ( <React.Fragment> { (() => { if (context.state.language === 'cz') { return <div> <h1 className="page-heading-h2">{translationCZ.portfolio.h1}</h1> <h2 className="page-text">{translationCZ.portfolio.h2}</h2> </div> } else if (context.state.language === 'de') { return <div> <h1 className="page-heading-h2">{translationDE.portfolio.h1}</h1> <h2 className="page-text">{translationDE.portfolio.h2}</h2> </div> } else if (context.state.language === 'fr') { return <div> <h1 className="page-heading-h2">{translationFR.portfolio.h1}</h1> <h2 className="page-text">{translationFR.portfolio.h2}</h2> </div> } else { return <div> <h1 className="page-heading-h2">{translationEN.portfolio.h1}</h1> <h2 className="page-text">{translationEN.portfolio.h2}</h2> </div> } })() } </React.Fragment> )} </MyContext.Consumer> <div className="row"> <div className="col-md-6 col-lg-4"> <a> <img src="https://source.unsplash.com/HKhdAsLYiQc/800x800" srcSet="https://source.unsplash.com/HKhdAsLYiQc/800x800 1x, https://source.unsplash.com/HKhdAsLYiQc/1600x1600 2x" alt="Concrete building in Shinjuku-ku, Japan by Dmitri Popov" /> </a> </div> <div className="col-md-6 col-lg-4"> <a> <img src="https://source.unsplash.com/jTCLppdwSEc/800x800" srcSet="https://source.unsplash.com/jTCLppdwSEc/800x800 1x, https://source.unsplash.com/jTCLppdwSEc/1600x1600 2x" alt="Modern apartment building in Berlin, Germany by Grant Lemons" /> </a> </div> <div className="col-md-6 col-lg-4"> <a> <img src="https://source.unsplash.com/fYO1T495QCM/800x800" srcSet="https://source.unsplash.com/fYO1T495QCM/800x800 1x, https://source.unsplash.com/fYO1T495QCM/1600x1600 2x" alt="Building in Chicago, United States by Christian Perner" /> </a> </div> <div className="col-md-6 col-lg-4"> <a> <img src="https://source.unsplash.com/w7YCquMkv2c/800x800" srcSet="https://source.unsplash.com/w7YCquMkv2c/800x800 1x, https://source.unsplash.com/w7YCquMkv2c/1600x1600 2x" alt="Petersen Automotive Museum in Los Angeles, United States by Denys Nevozhai" /> </a> </div> <div className="col-md-6 col-lg-4"> <a> <img src="https://source.unsplash.com/mQiZnKwGXW0/800x800" srcSet="https://source.unsplash.com/mQiZnKwGXW0/800x800 1x, https://source.unsplash.com/mQiZnKwGXW0/1600x1600 2x" alt="Building in Los Angeles, United States by Kimon Maritz" /> </a> </div> <div className="col-md-6 col-lg-4"> <a> <img src="https://source.unsplash.com/s_JSq-i4m8A/800x800" srcSet="https://source.unsplash.com/s_JSq-i4m8A/800x800 1x, https://source.unsplash.com/s_JSq-i4m8A/1600x1600 2x" alt="Akron Art Museum in Akron, United States by Lance Anderson" /> </a> </div> </div> </div> </div> )}export default PortfolioAdding the translations
React Context is in place and our website is ready. What we need to do now is create JSON files for each language variant. Since we have four variants, we will need four files, cz.json, de.json, en.json and fr.json. The structure will be always the same. There will be four nested objects, nav, about, home and portfolio with key-value pairs for individual strings. We will store these files will be in src/translations/ directory.
JSON file for Czech translation.
// src/translations/cz.json{ "nav": { "about": "O mě", "home": "Domů", "portfolio": "Mé portfolio" }, "about": { "h1": "Ahoj, jmenuji se Jake Stuart.", "p": "Jsem web designér a vývojář ze Sydney s více než 10 let zkušeností. Mám vášeň pro vytváření krásných, intuitivních a vysoce kvalitních řešení. Mám rozsáhlé zkušenosti s web designem a jeho vývojem. Dříve jsem pracoval v Instagramu a Square v San Francisku." }, "home": { "h1": "Ahoj, mé jméno je Jake.", "h2": "Jsem web designér a developer." }, "portfolio": { "h1": "Zde jsou ukázky mé nejnovější práce.", "h2": "Pokud chcete vidět více, prosím kontaktujte mě přes email nebo sociální sítě uvedené na stránce O mě." }}JSON file for German translation.
// src/translations/de.json
{ "nav": { "about": "Über mich", "home": "Zuhause", "portfolio": "Mein portfolio" }, "about": { "h1": "Hallo, mein Name ist Jake Stuart.", "p": "Ich bin ein Webdesigner und Entwickler aus Sydney mit mehr als 10 Jahren Erfahrung. Ich habe eine Leidenschaft für schöne, intuitive und qualitativ hochwertige Lösungen. Ich habe umfangreiche Erfahrung mit Webdesign und seiner Entwicklung. Zuvor habe ich in Instagram und Square in San Francisco gearbeitet." }, "home": { "h1": "Hey, mein Name ist Jake.", "h2": "Ich bin Webdesigner und Entwickler." }, "portfolio": { "h1": "Hier sind Beispiele meiner neuesten Arbeit.", "h2": "Wenn Sie mehr sehen möchten, kontaktieren Sie mich bitte per E-Mail oder über soziale Netzwerke, die auf der Seite Über mich aufgelistet sind." }}JSON file for English translation.
// src/translations/en.json{ "nav": { "about": "About me", "home": "Home", "portfolio": "My portfolio" }, "about": { "h1": "Hello, my name is Jake Stuart.", "p": "I'm a web designer and developer from Sydney with over 10 years experience. I have a passion for creating beautiful, intuitive and highly crafted solutions. I have wide ranging experience in web design and development. Previously, I worked at Instagram and Square, both in San Francisco." }, "home": { "h1": "Hello, I'm Jake.", "h2": "I am a web designer and developer." }, "portfolio": { "h1": "Here are the most recent examples of my work.", "h2": "If you want to see more, please contact me by mail or on social media links on about page." }}JSON file for French translation.
// src/translations/fr.json{ "nav": { "about": "À propos de moi", "home": "Accueil", "portfolio": "Mon Portfolio" }, "about": { "h1": "Bonjour, je m'appelle Jake Stuart.", "p": "Je suis un web designer et développeur de Sydney avec une expérience de plus de 10 ans. J'ai une passion pour la création de belles solutions intuitives et très élaborées. J'ai une vaste expérience dans la conception et le développement web. Auparavant, je travaillais à Instagram et Square, à la fois à San Francisco." }, "home": { "h1": "Bonjour, je suis Jake.", "h2": "Je suis un web designer et développeur." }, "portfolio": { "h1": "Voici les exemples les plus récents de mon travail.", "h2": "Si vous voulez voir plus, s'il vous plaît me contacter par mail ou sur des liens de médias sociaux sur la page à propos." }}Closing thoughts on React Context and building a multilingual website
Congratulations! You have a fully working multilingual website built with React, React Context and React router. I hope you enjoyed this simple tutorial and learned something new. As we saw in this tutorial, React Context API is very easy to implement and use. It can help us do a lot of things, such as create a small and simple multilingual website.
If you work on a small website or app, this tutorial can help you make your project multilingual without the need to add extra dependencies. However, keep in mind that this may not be the best approach if you work on something bigger. Then, I would suggest using available solutions such as react-intl. Nonetheless, this decision is only up to you.
Anyway, what do you think about using React Context API in the way we used it in this tutorial? Would you use this or similar approach for some small project? Or, would you do something different? Final words? Thank you for your time and have a great day!
Do you have any questions, recommendations, thoughts, advice or tip you would like to share with other readers of this blog, and me? Great! Please share it in a comment. Or, if you want to keep things more “private”, feel free to contact me on twitter or send me a mail. I would love to hear from you.
Did you like this article? Please subscribe.
Are you on social media? Let’s connect! You can find me on Twitter and Dribbble.
Originally published at Alex Devero Blog.
How to Use React Context to Build a Multilingual Website Pt.2 was originally published in Hacker Noon on Medium, where people are continuing the conversation by highlighting and responding to this story.
Publication date
Disclaimer
The views and opinions expressed in this article are solely those of the authors and do not reflect the views of Bitcoin Insider. Every investment and trading move involves risk - this is especially true for cryptocurrencies given their volatility. We strongly advise our readers to conduct their own research when making a decision.