Latest news about Bitcoin and all cryptocurrencies. Your daily crypto news habit.
 A quick guide on what it does, and why it’s so popular.
When creating a new React Native app, it’s common to think in terms of two choices. Using Expo. Ot not using Expo. Even the official React Native Getting Started docs describe it in these terms.
Expo has become incredibly popular for several reasons:
- You can test on a real device without having an Apple Developer Account ($99/year). This is accomplished via their free Expo app in the Google Play and App Store. Inside the Expo app, you can run your own app. It’s not exactly like installing your app on a device, since you’re really just in the Expo app. But it’s still pretty cool.
- Expo handles a bunch of config steps for deploying your app. A lot of people learning React Native are not coming from a mobile development background, so doing this configuration themselves seems daunting.
- Expo has an SDK to handle all kinds of things like using the camera, accelerometer, maps, location tracking, analytics, etc. Granted, most of these features can be implemented using open source packages, but it is nice that Expo provides so many of these in one place.
How Expo Works
Forget about Expo for a second and let’s just discuss React Native.
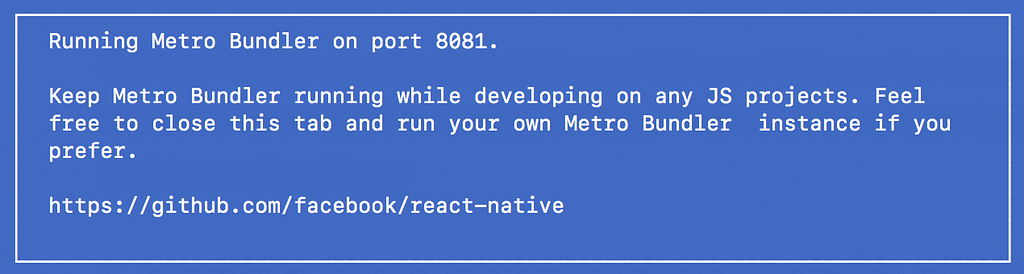
A React Native app is a compiled app that is running some Javascript. Whenever you build and run your React Native project, a packager starts up called Metro. You’ve probably seen this output in your terminal before, letting your know the packager is running.
The packager does a few things:
- Combines all your Javascript code into a single file, and translates any Javascript code that your device won’t understand (like JSX or some of the newer JS syntax).
- Converts assets (e.g. PNG files) into objects that can be displayed by an Image component.
When you aren’t using Expo, you run your app like this.
react-native start
With Expo though, you run it like this (using their CLI tool).
exp start
Both of these commands start up the same packager that we just discussed. The difference is that exp start also starts something called the Expo Development Server. This server runs a process that grabs your Javascript bundle created by the React Native packager (Metro), and runs it inside the Expo app on your simulator.
Distributing Your App With Expo
There are two ways to distribute your app with Expo. The easiest way is to have people download the Expo app from the Google Play or App Store. This Expo app can run your app inside of it. It loads apps via a URL that you provide. You’ll need to push your Javascript code to the remote location accessed by this URL.
exp publish
That’ll do it, as well as print your URL in the terminal. Give that URL to others so they can type it into Expo and run your app.
Running your app inside the Expo app is OK for getting started. But at some point you’ll want to put your app straight on people’s devices. Like putting it on Hockeyapp to distribute it to testers, or putting it on the Google Play or App Store. To do this, you’ll need to create a “standalone app”.
A standalone app is Expo’s term for an app that runs outside of the Expo app. It’s just like an app you’d download from the App Store. To create the iOS app, you run this command.
exp build:ios
The final product is an IPA file that you can submit to Apple. For Android, you run exp build:android and get the APK file for the Google Play Store.
When your standalone app is created, Expo puts your Javascript in two places:
- A local copy is included in the IPA or APK file.
- A copy is hosted remotely with Amazon Cloudfront, a super fast CDN.
When your app launches, it will check the CDN for changes to your Javascript, and pull those down if any exist. If there are no changes, it will use the local copy. A lot of improvements to this process were released in Expo SDK 26.0 (released March 2018).
Updating your App
Traditionally, iOS and Android apps have been re-submitted to the Google Play or App Store when releasing new versions. This involves creating a new IPA or APK file, and then re-submitting to the associated Store.
With Expo though, your Javascript code is hosted remotely, and your app will download any changes to this remote Javascript. So if your updates were just Javascript changes, then simply re-publish them.
exp publish
This is often referred to as an “over-the-air” update. Keep in mind that not all updates can be over-the-air. For example, project-level settings like the name of your app are not stored in the Javascript bundle. So if you change these, they don’t get updated via exp publish. To update your app with project-level changes, you need to generate a new IPA/APK file and then re-submit your app to the Google Play or App Store.
Expo’s Shortcomings
When you create your app via Expo, it creates a file structure for you that does not include the iOS and Android project files. Some features require you to tweak these files though. One example is adding a third party push notification library. To do this, you must do the following in that project file:
- Turn on the push notifications capability.
- Link the push notification library to your app’s bundle (something that react-native link would likely do for you, depending on the push library you’re implementing).
With Expo, you can’t do those steps because there is no project file to do them in. So here is where the road leads to “detaching” from Expo. Detaching will produce these project files so you can configure them.
There are two options when detaching from Expo.
- Completely remove Expo. This gives you a project similar to what you’d get with react-native init.
- Partially remove Expo (often referred to as ExpoKit). This allows you to still use the Expo SDK. Your Javascript continues to be hosted remotely and updated via exp publish.
Both options give you the iOS and Android project files so you can configure them yourself.
In Summary
Expo is a great tool for getting started quickly with React Native. However, it’s not always something that can get you to the finish line. From what I’ve seen, the Expo team is making a lot of great decisions with their product roadmap. But their rapid pace of development has often led to bugs in new features.
I would venture that many experienced React Native developers do not use Expo. Once you get comfortable with all the steps required to configure your projects yourself and deploy your apps, the benefits of Expo are greatly diminished. Also, if you’re looking for a way to handle over-the-air deployments, Microsoft’s CodePush is still best-in-class.
It’s an exciting time to be a React Native developer, and Expo has certainly fueled it’s popularity by making it more approachable for newcomers. For that reason, I think they definitely deserve the acclaim they’ve received. And I look forward to watching their product evolve over time.
Understanding Expo for React Native was originally published in Hacker Noon on Medium, where people are continuing the conversation by highlighting and responding to this story.
Publication date
Disclaimer
The views and opinions expressed in this article are solely those of the authors and do not reflect the views of Bitcoin Insider. Every investment and trading move involves risk - this is especially true for cryptocurrencies given their volatility. We strongly advise our readers to conduct their own research when making a decision.