Latest news about Bitcoin and all cryptocurrencies. Your daily crypto news habit.

I’ve been playing with Swift and iOS/macOS development in my spare time for a few years now — ever since the release of Swift 1.2. While I would still consider myself very much a Swift novice (no thanks to all Apple’s overhauls to the language), I find it to be a very enjoyable and powerful language to work with. I’ve even released a few iOS and macOS apps to varying degrees of success over the years (yay side projects).
Since I spend most of my professional effort working on backend development I have largely limited my interest and time spent learning about Swift to my increasingly limited “Hobby Time”. This being the case, I was understandably excited when typically closed-door Apple announced in 2015 that they were unleashing Swift to the open source world by means of the Apache License 2.0. Following this announcement IBM was one of the first major players to make investments in the language by means of developing an open source HTTP server and an accompanying web server named Kitura.
Since then, a variety of other server frameworks have sprung up such as Vapor and Perfect, both of which seem to be building polished, feature-rich, and well documented tools for constructing a stack built around Swift. I’ve read a number of reviews and tutorials looking at these frameworks but I haven’t had a chance to dig into each of these yet. I plan to in the future.
In March of this year, Apple announced an asynchronous event-driven network framework during a development conference in Tokyo. Dubbed SwiftNIO, Apple hopes that the framework will allow for the creation of high-performance TCP/IP based servers and clients written in Swift. Now that the server-side Swift ecosystem seems to be maturing a bit, it seemed like a good idea to take a dive in an explore the low level protocol handing in Swift before moving up the stack to some of high-level web frameworks.
What is Daytime? 🗓🕐
When I decided I wanted to get started with Swift at a low level I didn’t really have any ideas what I could build that would be a good introduction. There were a few similar tutorials I came across but not wanted to do a blatant rip-off I decided to go with the tried and true method of decision making, I asked Google.
That’s how I discovered Daytime, a super simple tcp protocol that predates me (Daytime is over 35 years old), and has since been rendered completely useless.
Basically, back in the days before NTP, there was Daytime, a tcp protocol that simply returned a string representation of the time when a client makes a connection before terminating said connection. Daytime doesn’t even strictly define the date format to be returned to the client 🤐.
Getting Started
I’m going to assume you’re developing on macOS, but if you’re on Linux you can follow these instructions to get Swift set up. As for macOS…
- Make sure Xcode is up to date. You can do this in the App Store.
2. Install brew (if you don’t have it already)
$ /usr/bin/ruby -e “$(curl -fsSL https://raw.githubusercontent.com/Homebrew/install/master/install)"
3. Check your version of Swift installed. You’ll need at least 4.1.1
$ swift --version
4. Install SwiftNIO
$ brew install swiftxcode/swiftxcode/swift-xcode-nio
5. Update your Xcode templates to include the new Server templates
$ swift xcode link-templates
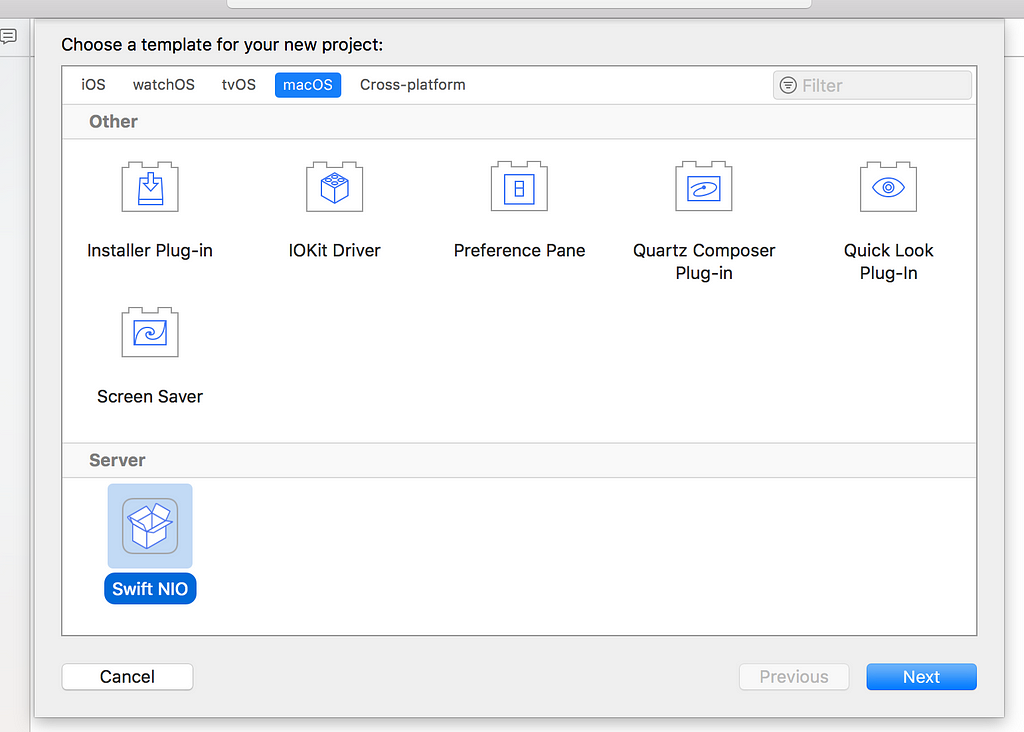
Setting up the Project
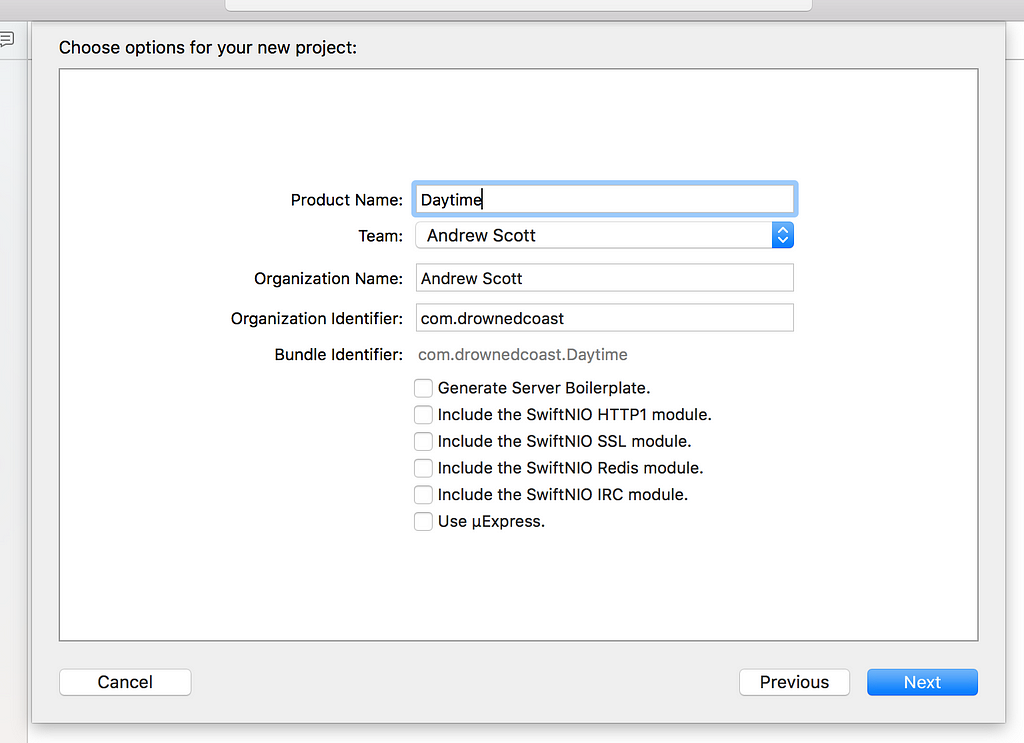
Open Xcode and create a new Project. In the template selection dialog open the macOS tab and at the very bottom should be a section called Server with an option named Swift NIO. Next give a name to your project and unselect all of the options, then click “Next”.
 The Code 🆗
By using Apple’s template to create the project you should get a bit of code built-in including a Package.swift and main.swift file as well as having Xcode configure the Product and deploy target. While this isn’t how you would launch the script from an actual deployment, for our testing purposes this makes things easy. We may need to tweak things just a bit in order to allow our code to run from Xcode and also from the terminal.
Package.swift
By using the Xcode template this file will already be included in your project and will likely look similar to my example below. Since our Daytime server will not have many dependencies the only thing we really need is TIO.
main.swift
As its name might suggest, main.swift is where the real meat and potatoes of our server is taking place. Here we define our Server class, which contains all the boilerplate code necessary to run our TCP/IP server.
You can see in the Configuration struct on line 14 that we’re assigning values such as the listening host (localhost) and the port (1313 in our case).
A bit further down on line 25 we’re initializing our server within the init function. We’ll pass in the config values set in the Configuration struct as well as set the eventLoopGroup, which acts as a threadpool on the server for handling requests. In this example I’m setting this value to the number of core on the system which will make the maximum number of system threads available for the server.
The following functions such as listen and listenAndWait are primarily boilerplate code and just define how the server should be listening for connections.
The last thing to note from this code is within the makeBootstrap function where we are finishing our server setup, specifically on line 84 where we set DaytimeHandler as the handler for the accepted channels.
Finally, on lines 98–99 we create our server and start listening on the server.
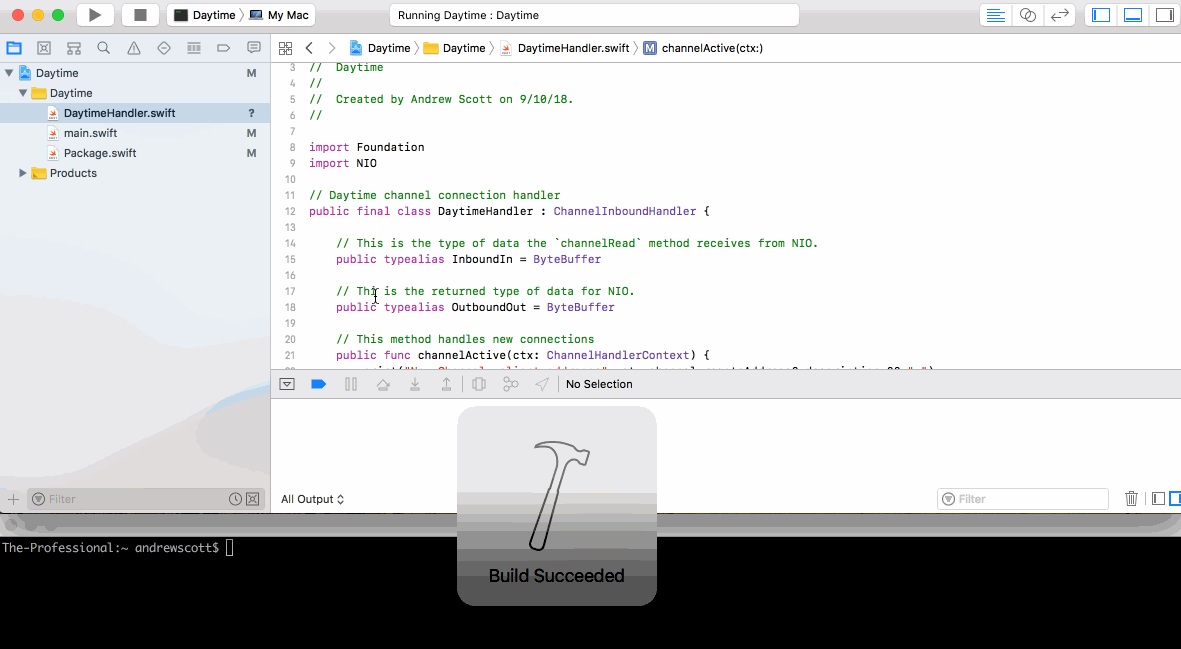
DaytimeHandler.swift
DaytimeHandler defines the handler that will be responsible for handing incoming channels, it does this by implementing the ChannelInboundHandler protocol.
Since we’re implementing an already existing protocol we’ll just be overriding default methods of that protocol here.
Note: The Daytime protocol drops any client input and will terminate the connection after it has responded with the current time/date.
On lines 16 and 19 we’ll define inbound and outbound data types. So we expect a ByteBuffer if any input is provided and we return a ByteBuffer as well.
Next we’ll look at the channelActive function on line 22. This function handles new active connections and any provided input. First we’re logging connection details to stdout, then creating a new buffer, then adding the time/date string to the buffer before writing the buffer to the channel and flushing the channel and finally closing the channel.
The channelInactive and errorCaught basically just handle additional logging when the connection is closed or if an error occurs.
Lastly we have our getTimestamp on line 43. This method uses Swift’s built-in Date and DateFormatter to get the current server time in GMT and returns a string representation of the time/date. I also discovered that NSDateFormatter is an excellent resource for figuring out date formats in Swift.
Running the Server
Running from Xcode
The last step here is running the code. The easiest way to do this is to simply click the run button in Xcode.
Running from the Terminal
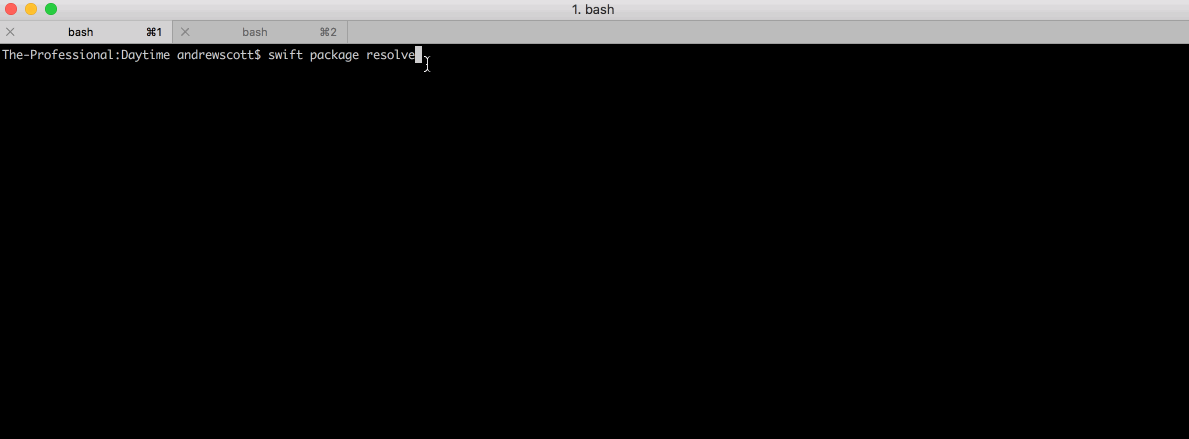
It can also be run directly from the command line. You can do this by running the following commands in the directory containing your Package.swift file
$ swift package resolve$ swift run
Testing
Newer versions on macOS include netcat (nc) by default. You can test the Daytime server by making a connection to your localhost on port 1313 (or whatever port you specified in main.swift).
$ nc 0.0.0.0 <port>
Summary
And with that you’ve now implemented a 3 decade old tcp protocol using a hip, cutting-edge language. In the future I hope to take a deeper look into server-side Swift and how it can be used with other deployment technologies like containerization and CI/CD pipelines.
You can find my full code here.

Building a Daytime Server from Scratch with SwiftNIO was originally published in Hacker Noon on Medium, where people are continuing the conversation by highlighting and responding to this story.
Publication date
Disclaimer
The views and opinions expressed in this article are solely those of the authors and do not reflect the views of Bitcoin Insider. Every investment and trading move involves risk - this is especially true for cryptocurrencies given their volatility. We strongly advise our readers to conduct their own research when making a decision.